- REVIEWS
Camera Reviews 
More Reviews Mobile Reviews Photography Reviews - GALLERIES
- VIDEOS
- BUYER'S GUIDES
Rock Art: Color, Pattern And Design Etched In Stone

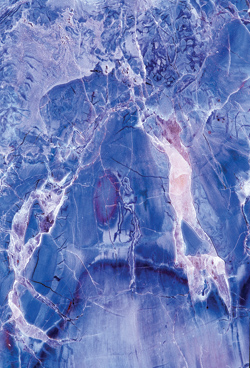
Amazing rocks are found everywhere. While I was walking on a beach in Washington State I came upon the formation in (#1). When I was shooting tide pools south of Monterrey in Northern California, I found the remarkable design and color combination in (#2). Halfway around the world in Namibia right behind the outdoor bar in a beautiful lodge built into a mountain side were rocks that kept me shooting for two hours. I forgot I was thirsty in the desert heat because the designs were so captivating. One of the best designs I found is (#3). On the East Coast of the US, I traveled to Clinton, New Jersey to photograph the historic Red Mill, and on the bank of the Raritan River not 40 feet from a parking lot was a very different but equally beautiful rock formation, (#4). Note that I included the sky in this shot to show some context.
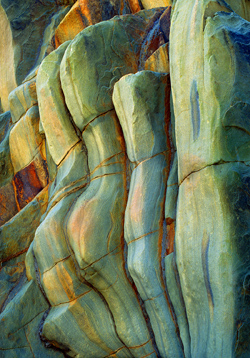
All Photos © Jim Zuckerman


Marble is another source for fantastic abstracts. Businesses that sell marble slabs to the construction industry are a great source of material. I bought a marble slab and had it shaped for use as a dining room table because I wanted to enjoy a natural piece of art in my home. I chose raintree marble from Brazil (I found it at a marble outlet in Atlanta, Georgia), and it has unbelievable designs, colors and patterns as you can see in (#5).

Outdoor Light
Rocks can be photographed in many types of light, but my preference is diffused daylight such as when the sky is overcast. The absence of harsh light, black shadows and bright highlights means that we can appreciate the artistry in the natural designs. If the pattern and color in the rocks have to compete with bold shadows and highlights that often create unwanted sheen, the impact of the natural design will be compromised.
For example, I’ve always loved the remarkable pattern in a rock I shot in Arizona (#6), but it was wet and the sun’s reflection on the slick surface has always bothered me. It is very distracting. The brilliant sheen pulls our attention away from the pattern. It would have improved if I had blocked the sun with my body as I took the picture. This is a good technique to use. If you find a beautiful rock pattern in sunlight, use yourself, a friend or some other object to shield it from the bright light. This simulates the soft and diffused light characteristic of an overcast sky.

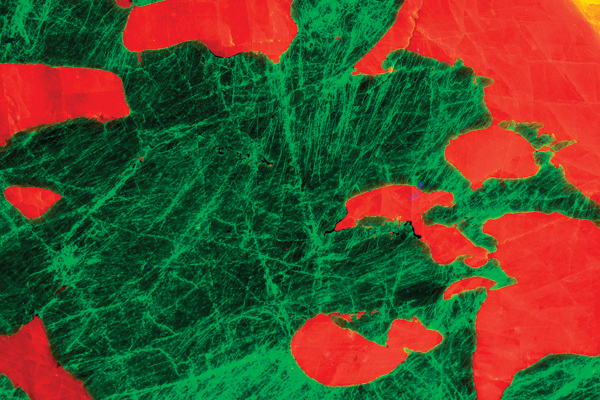
With a mineral like pyrite (#7), soft light is essential. The naturally reflective surfaces would become terribly contrasty with any other type of lighting other than diffused light.

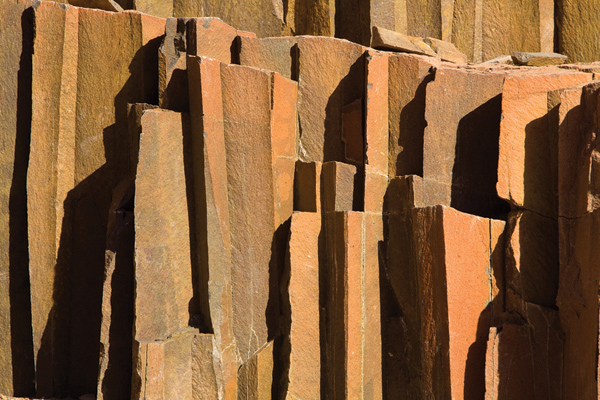
Rock art can also be photographed with side lighting. This brings out the texture and introduces shadows and highlights. As I said, this appeals to me less than diffused lighting, but compare the difference for yourself. You may prefer bold, angled light. Photos (#8 and #9) were taken in the same rock formation in Namibia called Organ Pipes. They were shot at the same time of day, but in (#8) I photographed a section of the formation lit by side lighting, and in (#9) I found an area in shadow. They are very different pictures, and I will leave it up to you which one you like better.

Window Light
If you have rock specimens you found on hikes, or perhaps you saw something you liked in a rock shop and brought it home, window lighting is ideal for photography. It is diffused, but it’s also directional. You can angle the rock so it is front lit, side lit or even backlit if you are shooting a quartz specimen or some other translucent type of rock. The unpolished piece of malachite (#10), is a good example of diffused side light, as is the stunning specimen of quartz after anhydrite (#11).


Notice how gentle the side lighting is in this shot and how flattering it is to the rock. The rare piece of chromium petrified wood, (#12), shows front lighting. The rock faced the window, and you can see that there isn’t one shadow in the image.
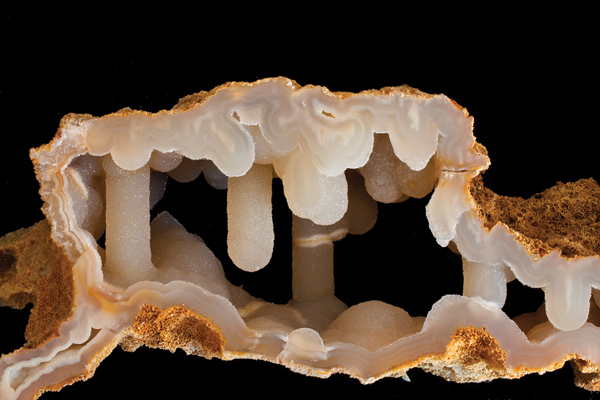
If you want to include in the photograph an entire chunk of rock, black makes the best background. I use a piece of black velvet because it absorbs light very well. Instead of ending up with a dark gray backdrop as you would with most black fabrics, velvet absorbs most of the light and stays a rich, saturated black as you can see in (#13), a unique specimen of alarcasite and calcite. Black made the agatized coral, (#14), stand out quite dramatically, too. (I wish to thank Tom Kurras of Hendersonville, Tennessee for allowing me to photograph his museum-quality mineral specimens.)

Exotic Treatments
Closeups of rocks look like art. If you want to embellish and enhance the colors and the degree of abstraction in the pictures of rock designs, there’s no reason why you shouldn’t explore that avenue. Accurate representation of art in nature is something we all appreciate, but thinking outside the box is a lot of fun and very creative. For example, you can add color saturation in the camera or in post processing. You will totally transform the image. Colors that I call “hidden” are suddenly revealed, and the results can be dramatic. Image (#15) is an example.

Some rocks have minerals in them that respond to blacklight. The first time I saw this I was amazed at how a normal looking rock became a psychedelic abstract. The piece of orange calcite (#16), is an example. This is a completely unmanipulated Raw file; the intense, out-of-this-world colors were exactly what I saw when a black light was directed onto the rock in a dark room.
Depth Of Field
Natural rock surfaces have depth. The uneven topography of a rock or mineral should be photographed with tack sharp clarity. I recommend using a tripod along with a small lens aperture. Make the back of the camera—i.e. the plane of the digital sensor—as parallel as possible to rock’s surface. This means that more points on the rock will be approximately the same distance to the sensor, and that helps you maintain depth of field. This is especially important in macro work when the designs in the rocks are small.


![]()
Get the Latest Photo Tips, News & Reviews from Shutterbug!
| Camera Reviews Other Reviews | Mobile Reviews Photography Reviews Columns | News | Features | How-To | Resources |
 © 2025 Shutterbug
AVTech Media Americas Inc., USA
All rights reserved