RGB 2 B+W; Conversion Strategies For Tonal Control Page 2
 |
|
|
 |
|
|
 |
|
|
|
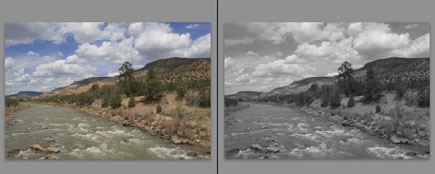
My intent here is to show you tonal control and manipulation solely through the use of so-called “conversion” tactics, that is, selecting a tonal value for certain colors. I assume that certain refinements will occur after this step to complete the image, but that this step can eliminate a certain need for more tedious work later.
This color conversion can be done broadly or with very fine distinctions between shades and tints of a color, depending on the tools you use and the combination of colors you adjust. As you work you will notice that green is indeed a combination of blue and yellow, and that too much blue manipulation can bring noise in as a detrimental factor. But that’s something you can see as you work, given that you often bring the image to 100 percent as you go through the process.
 |
|
|
 |
|
|
 |
|
|
 |
|
|
|
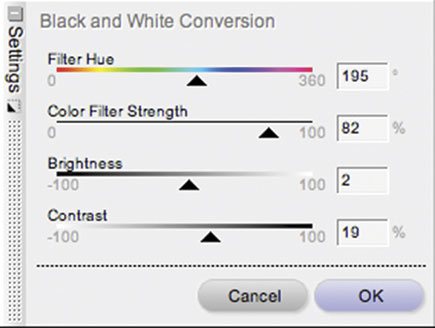
In this article I have illustrated the idea using some common image-editing programs such as Photoshop, Aperture, and Lightroom, including Adobe Camera Raw, but there are many more to explore such as Nik Software’s Silver Efex Pro, Alien Skin’s Exposure, Adobe’s Elements, Corel’s Paint Shop Pro, DxO’s Optics Pro, Phase One’s Capture One, and most of the camera company Raw processor programs. Most of these have both “manual” and preset controls as well.
 |
|
|
 |
Now that we have printers and papers that can deliver extremely subtle black-and-white prints and programs and tools that concentrate on the black-and-white workflow, black-and-white photography will continue to undergo a renaissance that will allow many more of us to create prints that rival those made by experienced darkroom workers in years past.
George Schaub is teaching a weeklong workshop on Black-and-White Digital Photography at the Santa Fe Workshops from March 13-19, 2011 (www.santafeworkshops.com) and a black-and-white printing course at the Maine Media College in the summer of 2011 (www.mainemedia.edu). Check the websites for more details. Schaub’s black-and-white work can also be seen at: www.georgeschaub.com.
- Log in or register to post comments

