Quick Digital Output Tips; How To Put Your Photos On Show
Taking, editing, and enhancing photos are just the first few steps in the imaging process. Many photographers spend lots of time in these phases and then let their carefully crafted pictures sit dormant on their hard drive. These quick tips are designed to help you put your photos on show, whether as prints or on the web. There are multiple ways to share your images, so carry on your passion for picture production by taking the final step and outputting your photos for all to see.
Match the file size to the output.
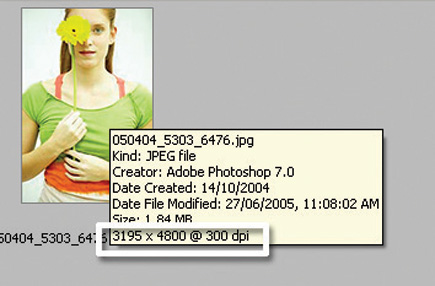 |
As a rule of thumb try to ensure that you have at least 200 pixels for every inch of the printed photo. If you want a print that measures 10x8" then start with a digital photo that measures 2000x1600 pixels (10"x200 pixels per inch by 8"x200 pixels per inch). Smaller prints need less pixels in order to create sharp, clear prints.
Pretest your sharpening.
 |
Most digital files can be enhanced with sharpening but how much is enough? It depends on the final output. The same settings cannot be used for a picture that will be used on screen and one that will be for a high-quality poster. Produce several test files at different settings. Print and study closely before choosing which settings to use. One set of tests will guide you in the future.
Neutral monochrome means more inks.
 |
For the most neutral black and white prints seek out printers that contain more than one black cartridge. For example, printers that use the new Epson K3 inks produce great monochrome photos because the system contains not one but three black cartridges--Black, Light Black, and Light Light Black.
Upscale at raw conversion.
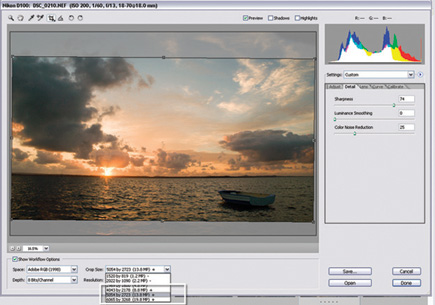 |
Need more pixels to create larger prints? One way to do this is to upscale the dimensions of your digital photos at the same time that you are converting them from raw. Many professional photographers use the upscale options in their favorite raw conversion utility to increase the size of their photos. They maintain that the results are much sharper than when the same change is made post-conversion.
Avoid the convert to Grayscale mode pitfall.
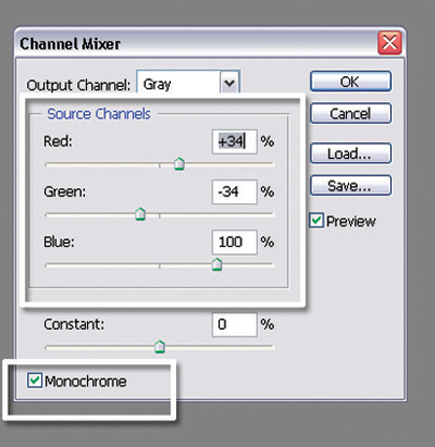 |
Though ease and convenience makes the Image>Mode>Grayscale route a tempting one, try other more customizable options when changing a color photo to black and white. A good place to start is with Image>Adjustments>Channel Mixer. Select the Monochrome option (bottom left) and then adjust the sliders but make sure that the total of all three percentages hover around 100.
Don't convert to CMYK for a CMYK printer.
It may at first seem strange but there is no need to convert your RGB (red, green, blue) files to CMYK (cyan, magenta, yellow, and black) for outputting on an inkjet printer that uses a CMYK inkset. The printer driver itself handles this conversion and has a better understanding of how to massage the colors and tones of a RGB photo into the range of printed inks on paper.


