- REVIEWS
Camera Reviews 
More Reviews Mobile Reviews Photography Reviews - GALLERIES
- VIDEOS
- BUYER'S GUIDES
Light Moods: Weather, Direction And The Magic Hour

All Photos © Sean Arbabi
Direction Of Light
While teaching a recent workshop along a beach, I gathered some students to show them the benefits of controlling the direction of light on your subjects using patterns in the sand and the setting sun (#2 and #3). As we stood facing north with the setting sun to our left, the sand was side lit and the patterns weren’t all that evident or distinct. But as we moved counterclockwise, slowly pointing more toward the sun, the wet sand began to shimmer and the small rivulets created by the receding waves picked up a golden glow. We went from a boring photo to a wonderful vignette just by moving a few feet and changing our direction of light. Depending on what you are photographing, the time of day and possibly the shape of your subject, the direction of light can deeply affect the color and contrast of your shot.


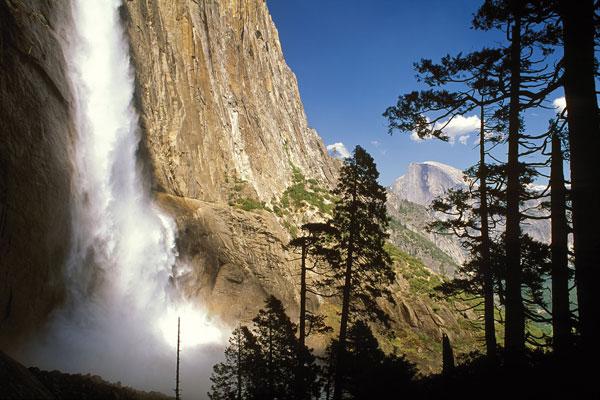
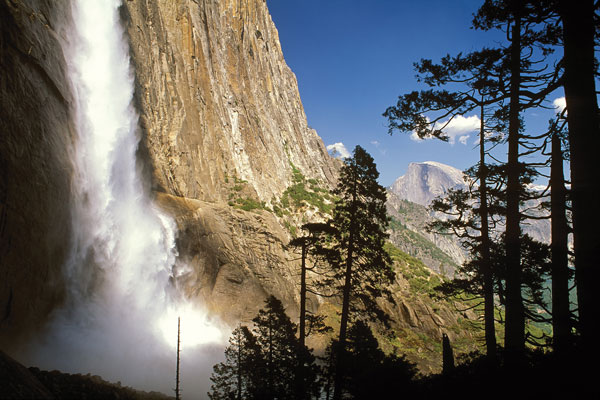
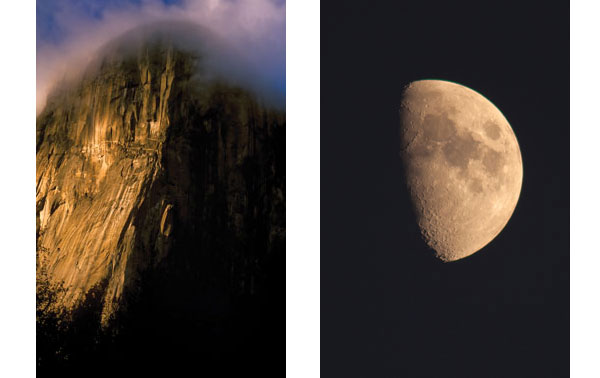
There are many different angles of light, but in general we deal with front, side and backlighting in the field. Front lighting is when you position yourself between the sun and your subject, with the sun at your back. While an easy lighting condition to meter for it can offer little shape or dimension, although you can still get good shot if the tones, subject matter or composition is strong. The 2 images of Half Dome (#4 and #5) work because the granite monolith rising above Yosemite Valley makes it a powerful vision and the time of day, composition and quality of light added to both scenes.
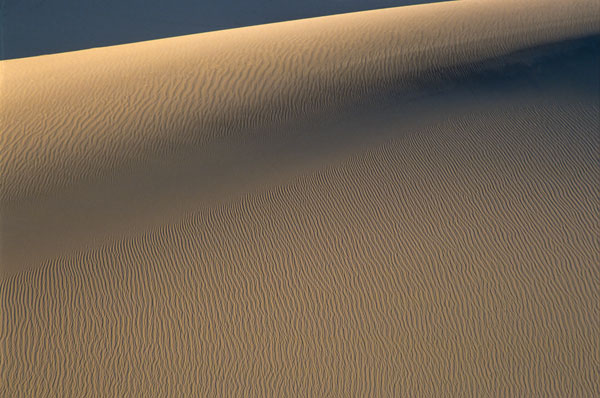
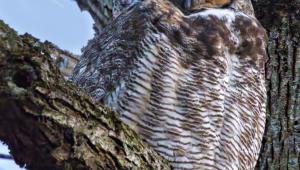
Side lighting, where the main light source is usually 90˚ off-axis, can give your subject shape, dimension and texture. The viewer gets a 3-dimensional feeling for the subject through the highlights and shadows cast on it. We can see this in these photos where the lighting helped bring out the patterns in the sand dune (#6), the curved shape of El Capitan (#7), or even the craters in the moon (#8).
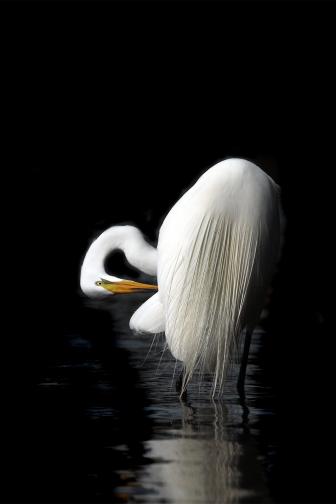
Backlighting is when the light source is behind your subject and it’s one of my favorite light conditions. Backlight can spotlight shapes and forms, create drama through contrast, add mood through exposure and bring out strong color with translucent subject matter, such as wildflower petals. Since the contrast is usually high with backlighting, your main metering point often becomes the highlight areas. This could be the tone of the sky, clouds or water (#9); the bright highlights on this cactus (#10); or even the bright areas in the sky in this sunset scene (#11). All 3 images were shot pointing toward the sun, using the subject to block the extremely bright source to cut the contrast and avoid flare. As you can see this technique really helps to emphasize shape and enhance color.


Light’s “Quality Time”
Although weather patterns and geological formations can affect how light changes through the course of the day, the general pattern is that light changes from purple and pink light (dawn) to a deep warm orange (sunrise), then turns slowly to warm yellow (early morning) and on to a yellowish-white (midday). Later that pattern reverts to warm yellow (late afternoon), orange (sunset) and back to pinks and purples at dusk. Deciding when to shoot can change every aspect of your final image, altering the tone of your subject matter, the contrast and the overall color of the scene.
The times closest to sunrise and sunset usually offer the best chance of creating a quality photo (as it did in photo of the pelicans at sunset, #11). The harsh light of midday will render many scenes colorless and the overhead cast of light will create unflattering contrast. If skies are clear, I tend to scout, nap or hike to my next location during the middle of the day.
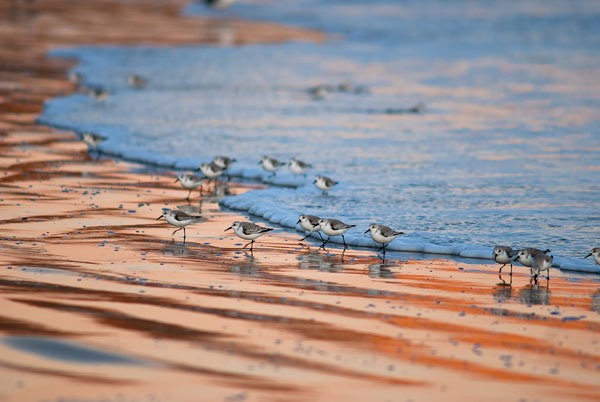
“Magic Hour”, the 30 minutes before and after sunset and sunrise provides wonderful qualities of colorful light, with the low angle of light creating warm tones and strong contrast. In this photo made at Drakes Bay along the California coast (#12) the sun had already dropped below the horizon. As the high cliffs turned orange the light reflected off the incoming surf and the contrast between the cool shade and warm reflections created a nice image of these feeding snowy plovers.
Sunsets and sunrises also provide strong warm hues, perfect for capturing landscape scenes or silhouettes with colorful skies. Long shadows create defining lines between dark areas and bright tones and also eliminate distracting elements, such as this photo of an oak tree at dusk (#13).

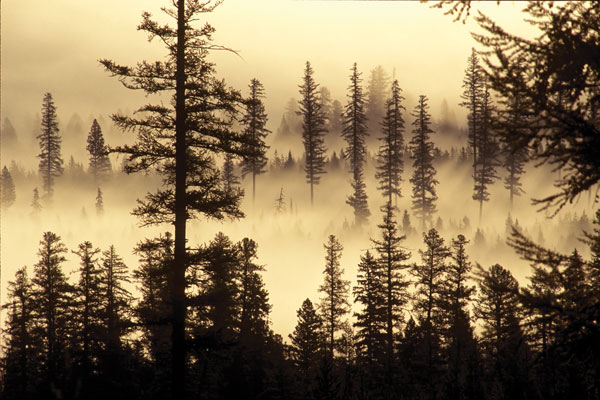
I’m no morning person but I’ve been out for thousands of dawns and sunrises only to be thankful I got up after seeing the results of my photos. One morning I left my cabin in western Montana and headed up a steep road completely engulfed in heavy overcast light caused by the low hanging clouds in the valley (#14). I hoped if I could get above these clouds, I might have a better chance of finding a photograph. As the skies cleared I knew I was above the clouds so I began to search for a scene, and when the sun rose a few minutes later, the silhouetted forest rising above the fog became my subject.
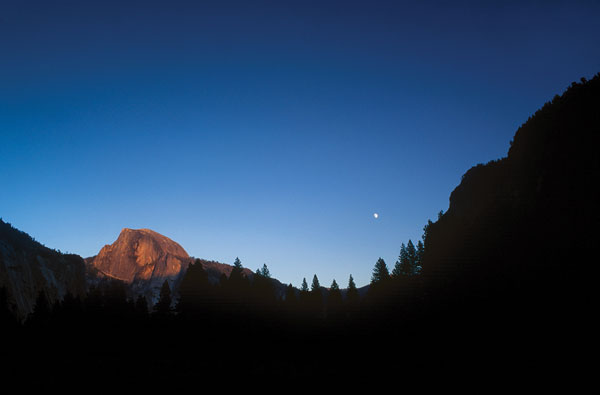
One sunset in Yosemite showed me the payoff that patience and being ready to shoot provides. When I was in position, I could simply wait and shoot Half Dome as the light went from wonderful to extraordinary, then diminished as more inclement weather rolled into the valley (#15, #16 and #17). Another example of waiting for quality light is these 2 photos (#18 and #19) made only 1 hour apart. The color and “presence” of the photo made nearer sunset is so much more dramatic.


Weather
Forecasts rarely work in favor of a nature photographer, so a big part of getting great shots is adapting to your conditions. Photographing nature for over 25 years, I have learned a mix of small tricks to create something from nothing, yet regardless of this experience I know I simply have to brave the elements to get the best shot. I’ve sat in the rain for days, hiked in pitch black forests after dusk, froze my buns off as temperatures dropped at sunset and been torn apart by mosquitoes, all out of the dedication to document great images of our natural world.
If I have a choice, I much prefer a cloud-filled sky to a cloudless one. Clouds can come in the form of soft billowy cumulus, stratus or cirrus versions, fog or overcast masses covering the sky. Overcast skies can create a perfect setting—or be an unwelcome sight—depending on your landscape. If I’m shooting in a forest, I favor overcast or fog over direct sunlight because the soft, diffused light creates less contrast and even lighting. Here are 3 different forest scenarios. While shooting in San Francisco’s Presidio (#20) the fog helped create a mysterious moody scene. As I entered Yosemite Valley, the fog and mists hid or unveiled pines throughout the composition (#21). In this forest scene (#22) I was on the edge of fog and sunlight, using the soft light to expose the scene but taking advantage of the contrast to add drama.


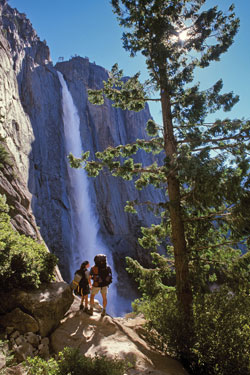
While I like a good touch of weather I certainly have nothing against working in bright sunlight. Sunny skies offer strong directional light plus fill the foreground with color and light. On a clear sunny morning heading up Yosemite Falls (#23), I was able to block the morning sun with a tall pine creating nice backlighting and a strong overall composition.
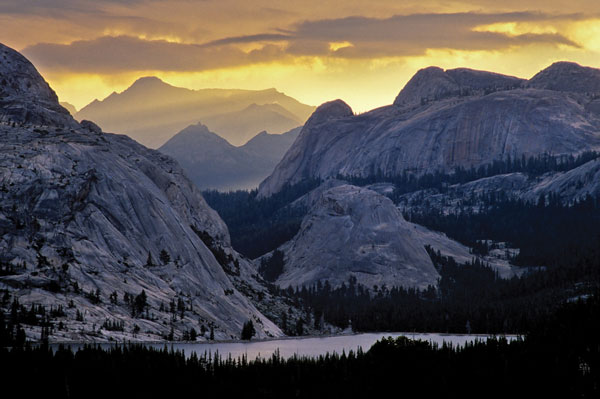
The unpredictability of storm light can be a godsend or a curse. Head out to shoot during a storm and you may produce one of the best images of your collection, or may spend an afternoon waiting with little to show for it as far as quality images go. Regardless, as the old adage goes, nothing in life worth fighting for comes easy, and I’d say storm light fits well into this category. The possibility of rainbows and lightning are yet another reason to consider this type of light, taking safety precautions into account. Whether approaching or clearing, stormy skies can give you your best shots. This photo (#24) was made at pre-dawn in the High Sierra at Lake Tenaya just as the sun cut through the clouds.
- Log in or register to post comments


![]()
Get the Latest Photo Tips, News & Reviews from Shutterbug!
| Camera Reviews Other Reviews | Mobile Reviews Photography Reviews Columns | News | Features | How-To | Resources |
 © 2025 Shutterbug
AVTech Media Americas Inc., USA
All rights reserved