- REVIEWS
Camera Reviews 
More Reviews Mobile Reviews Photography Reviews - GALLERIES
- VIDEOS
- BUYER'S GUIDES
I Got A New Camera. Now What Do I Need? 7 Things to Get You Started

You have common sense enough to know that you need a spare battery, high capacity memory cards, USB card reader and, for sure, a subscription to Shutterbug, so we won’t restate the obvious. But there are a few other things you really should have to maximize the fun and function of your new camera.
Here are seven to get you started.

1. Neck strap that doesn’t advertise the (expensive) brand of your camera
Don’t get me wrong—I really like the big, wide neck strap that has NIKON emblazoned in bright gold embroidery. Cool. But I won’t wear it outside the house. Why announce that I’m wearing a few hundred dollars worth of gadgets around my neck? I’ll take a strong, covert strap like the underreported UpStrap any day. Disclaimer: I’ve known Al Stegmeyer for years and I can testify that his “99.99% made in USA” UpStraps are the finest straps I’ve ever used.
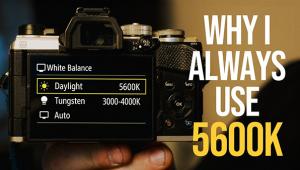
2. 30 minutes of quiet time with the Owner’s Manual
How long do you intend to keep your new camera? Two years? Five? Then do something truly un-American and spend half an hour reading the Owner’s Manual. You fritter away more time than that on YouTube or Seinfeld reruns, right? Here is your mission: learn how to set White Balance, particularly the manual way. Learn about ISO and what setting to use besides Auto. Learn about the special effects features that are often unique to a certain brand (I really dig Sony’s Illustration Picture Effect on my RX100 even though I detest the menu). Along the way, stop at any unfamiliar word or phrase and learn something new.

3. Second battery charger
If the battery must be in your camera to charge, woe is you. It may seem convenient to travel with one less accessory, but think again. While you are using the camera to charge the battery, you can’t use it as a camera. Buy a spare charger. Go online and search for a charger to match the brand and model of battery you have. For example, my ancient Panasonic Lumix DMC-L1 requires a CGR-S603A. A quick search on Amazon revealed several options starting at less than $8 including a 12V car adapter. (Hell, if I had known that I would have ordered a spare to keep in the truck years ago.)
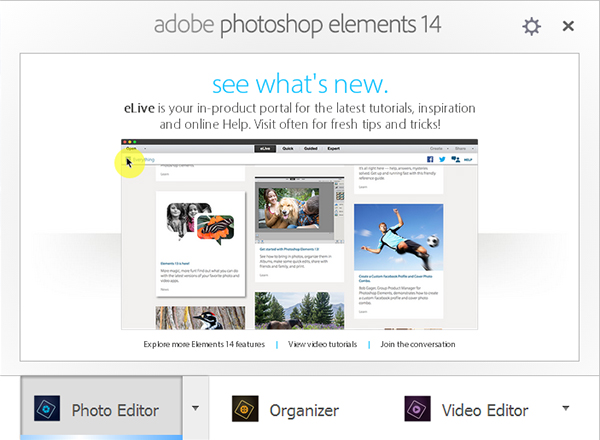
4. Adobe Photoshop Elements 14
Your camera may have come with a software CD or download key, but that’s an appetizer, not a meal. It takes you only so far. Elements may be all the Photoshop you’ll ever need. It allows you to pursue editing in Quick, Guided or Expert modes. Adobe Photoshop Elements 14 is available for $79 as an upgrade or $99 from scratch. If you shoot a lot of video, check out the version that includes Adobe Premier Elements. Teachers and students get a discount (check website) and most important of all—you can download the full version and try it for 30 days before buying.
5. A lens better than the kit lens
You probably have a kit lens that zooms from around 18mm out to about 55mm or so, no? It came with your camera and what you didn’t know is that although it’s an f/3.5 at the wideangle position, it stops down to f/5.6 when you zoom out to telephoto. At that setting, your camera picks a slower shutter speed to compensate for the drop off in illumination. That’s why the tight shot of your significant other came out fuzzy. Here are a few great sources for lens information, in alphabetical order. We’ll write more about individual models some other time. Lensbaby, Sigma, Tamron, Tokina.
6. DAM
The only thing worse than missing a great shot is taking a great shot and not being able to find it. You can buy a DAM, a Digital Asset Management system, and when your library of images reaches the thousands you dam well should. In the meanwhile, good work habits and diligent back-ups (see below) will go a long way.
This system isn’t perfect, but it’s not bad.
Create a master file for all images. Call it something obvious, like “Images.” Every time you download your camera, create a new folder. Use the date and a memory jogger for the folder title. E.g., “01-10-2016 Holly Birthday Party.” Pretty soon your file hierarchy looks like this:
 I use a lot of different cameras, so for me the top level folder is the name of the camera, but everything still rolls up to a master Image folder, like so:
 One advantage is that when it’s time to back up the images, I grab one folder, Images, and drag it to the HDD or cloud storage icon. Speaking of back-up plans…
7. Back-Up Plan
Saving digital image files to any type of storage media is like writing your name on an ice cube with a felt-tip pen—you know it will be there for awhile, but equally you know that it is not permanent. Subscribe to a cloud storage system (I like Box) and buy a large capacity external hard drive. Every time you create a new image folder and download images to it, copy it to the cloud and to the HDD. This leaves you with four copies, initially, a working copy on your main computer’s hard drive, one in the cloud and one on the external HDD—plus one you may not have thought of: the original files on the memory card. Simply because I am OCD and neurotic about losing images, I always keep the filled-up memory cards for a few weeks before reformatting them, just in case something blows up or disappears.
—Jon Sienkiewicz
- Log in or register to post comments


![]()
Get the Latest Photo Tips, News & Reviews from Shutterbug!
| Camera Reviews Other Reviews | Mobile Reviews Photography Reviews Columns | News | Features | How-To | Resources |
 © 2025 Shutterbug
AVTech Media Americas Inc., USA
All rights reserved