When it comes to dynamic focusing, I've always not been to understand it properly. Thanks for the useful tips.
Four Tips For Dynamic Close- Up Photos
Close-up photography--taking pictures at very close range--can provide a different outlook on everyday things, reveal details unseen by the naked eye, and turn common objects into intriguing abstract images.
The traditional ways to do close-up photography involves special gear: Simple close-up diopter lenses are inexpensive but reduce sharpness noticeably, especially at the edges of the image (really bad for flat subjects like stamps and coins). Extension tubes simply extend the distance between the optical center of the lens and the film or image sensor, thus having no adverse effect on image sharpness while allowing the camera lens to focus closer; but in doing so, they "eat light"--requiring additional exposure. Accordion-like bellow units are effectively variable-length extension tubes--they provide a range of magnifications without affecting image sharpness, but also "eat light."
All three of the above close-up tools prevent the camera lens from focusing out to infinity--not a factor in close-up work, or course, but requiring you to remove the items if you suddenly want/need to shoot something distant.
Macro lenses are generally the best solution because they don't involve extra pieces, they focus from life-size (1:1) magnification to infinity, and they can be used for normal photography as well as close-up work. But true macro lenses are fairly expensive, and they're typically bulkier and slower than non-macro lenses of a comparable focal length.
TIP 1: Blow It Up
You don't actually need special close-up gear to get "close-up" images. You can simply shoot images of small subjects (or portions of large subjects) with the lenses you have, at their minimum focusing distances, then blow those images up. Make big prints of the entire image or just a portion of the image (have your lab do it, if you don't do your own darkroom work).
If you're shooting digitally, enlarge the image up to 100 percent on-screen, or change the image size (in Photoshop, go to Image>Image Size), and see how big you can print it (or an interesting portion of it).
For the best results, use a slow, fine-grain film (or a low ISO setting and the highest resolution setting on a digital camera). Mount the camera on a tripod, and focus carefully--enlarging the image magnifies blur due to camera and subject movement and poor focusing.
 |
|
|
 |
|
|
TIP 2: Focus With Care
Depth of field is very limited at close focusing distances, so careful focusing is very important. It's best to focus manually, because an autofocusing system might not set focus where you want it on a close-up subject. When working at very high magnification (life-size and larger), it's easier to set the focusing ring to the lens' minimum focusing distance (or to the desired magnification, if using a macro lens), then move the camera closer to or farther from the subject to focus, rather than try to focus using the focusing ring. Moving the focusing ring also changes the magnification--a bad thing if a precise reproduction ratio is required.
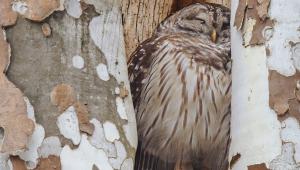
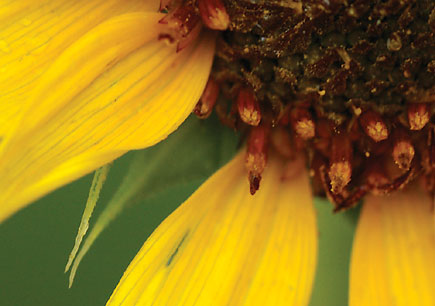
With living subjects, it's generally best to focus on the eye nearest the camera. With subjects like flowers, try focusing on a near petal, the central portion, and elsewhere. Use the camera's depth of field preview, or--with a digital camera--use the zoom feature in Playback mode to check the results. With close-up photography, it doesn't hurt to bracket focus, shooting a series of images each focused slightly differently.
 |
|
|
 |
|
|
- Log in or register to post comments


