The Digital Darkroom
Using The Extract Tool; Selecting Hard-To-Select Subjects
I am frequently asked how to cut people out of one picture and paste them into
another. All such work is preceded by first making a "selection"
of the area that you want to cut out. Selections can be made many different
ways. And, to some degree, the method you choose usually has to do with the
nature of the material or people who you want to select.
With straight, well-defined edges, it is fairly easy to make selections. But,
when the edges are fuzzy and involve flyaway hair, smoke, or glass, then the
selection method becomes more difficult. By the way, there are third-party plug-ins
to Photoshop that also offer a way to make fuzzy-edged selections. But, this
column is about the techniques necessary to successfully use a built-in Photoshop
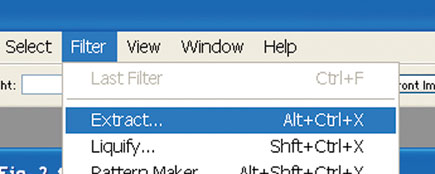
tool called the Extract tool. It is found under the pull-down menu item called
Filter.
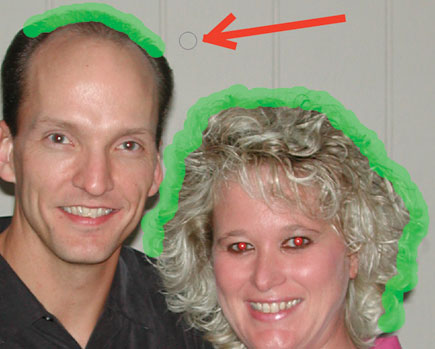
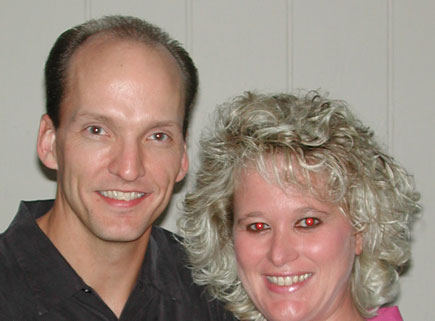
1 & 2. This is the engagement picture that I took of my daughter Kris and her boyfriend, Gregg. Notice the flyaway hair on Kris. That is the main problem when making a selection to remove the background in this picture. For purposes of this column, I cropped the picture as shown. And no, I am not going to discuss the redeye effect and its cure in this column.
 |
|
|
 |
|
|
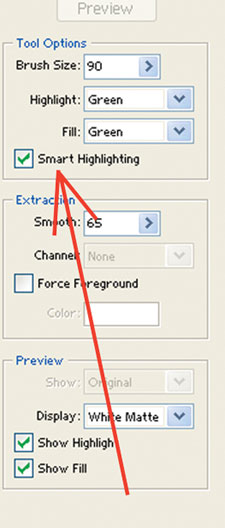
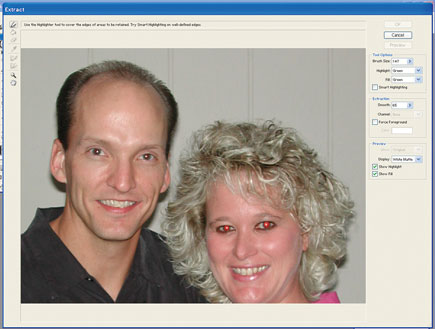
3 & 4. After cropping the picture I went to Filter to Extract. That caused Photoshop to open the Extract window. In the upper left corner are several tools and over on the right-hand side are several controls that alter the way the tools perform.
 |
|
|
 |
|
|
5. I next went to the upper left and selected the Brush tool. On the right-hand side, I set the Brush tool to 90. The red arrow points to the round circle of the Brush tool. Using this tool, I started to lay in a green mask around the outline of Kris' hair and the top of Gregg's hair. Both places involve thin, wispy hairs that need to allow the background to show through. It is important to keep the width of the green mask produced by the Brush tool as narrow as possible and still cover the areas where we will want to be able to "see through" to the background. Notice that I allowed the green mask to spill out into the background, but I have kept the width, where it begins to cover her actual hair, to a minimum. Anything within the width of the green mask is subject to being made transparent by the Extract tool if the tool "thinks" that a specific area needs to allow the background to show through. Since the top of Gregg's head, as silhouetted against the background, has wispy hairs that need to have the background showing through, I have made the green mask just wide enough to cover that area.
|
|
|
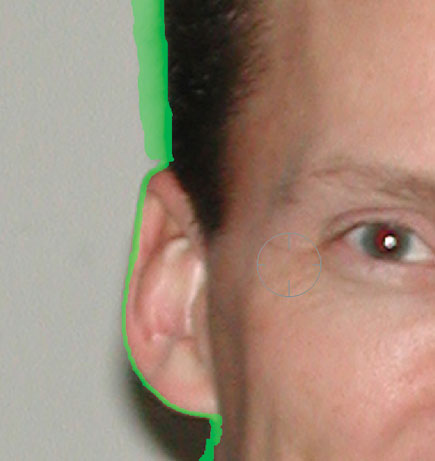
6 & 7. Next, it is time to lay in the green mask for the rest of the outline. For most of the rest of the outline, the mask can be pencil-line thin. It only needs to be wide enough to just barely cover the edge, since the edge is so clearly defined. To lay in this type of a green mask, I clicked on Smart Highlighting. This will change your cursor into a bull's eye-type tool instead of the round circle of the regular Brush tool. Using this Smart Highlighting tool, I carefully went all around the edge of the rest of the picture. If I had used too thick of a green mask line around his ear, I would have wound up with "holes" eaten right through his ear that would allow the background to show through. The Extract tool has a little trouble telling the difference between the light background (that it is supposed to drop out) and the lighter portions of the inner ear (that it is not supposed to drop out) since both areas are about the same density. Forget that they are different colors...the Extract tool works more on density levels than color tones.
|
|
|
|
|
|
- Log in or register to post comments
