- REVIEWS
Camera Reviews 
More Reviews Mobile Reviews Photography Reviews - GALLERIES
- VIDEOS
- BUYER'S GUIDES
The Digital Darkroom
Making Better Color Prints
I've spent the better
part of the past 20 years teaching folks how to do things in their traditional
color darkrooms. But, I've got to tell you, since digital imaging
has become a reality, there are some things I just can't do in
a wet darkroom that I can do with a computer. Let me explain. |
|||
For color negative printing,
the three grades of contrast that Kodak offers with RA-4 paper just don't
have all that much separation between them. In fact, you've got
to look real close in order to be sure which grade you're working
with. I've spent years struggling with marginal negatives and slides
trying to get prints that would be at least acceptable. Usually, I fell
far short of what I would have liked to have achieved. |
|||
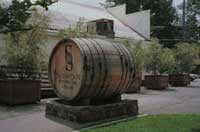
I scanned the negative on a
Nikon Super CoolScan LS-2000 at 2700dpi and brought it into Adobe Photoshop
Version 5.02 using a Pentium II-400 PC computer. There I deliberately
lowered the overall contrast of the image and made Image 1. I wanted to
show you that the contrast of a color image can be lowered. Black and
white darkroom technicians do this all the time with black and white images.
But, it just can't be done with color images--short of doing some
very elaborate contrast control masking or dye transfer printing. In this
case, it really doesn't help the image much. But, if the original
color negative had been a bit overexposed, the ability to lower the contrast
just a little would have been a big help. |
|||
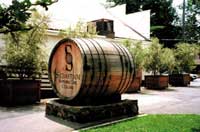
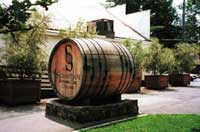
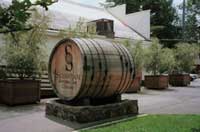
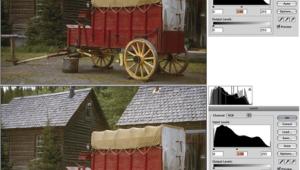
Then, I took Image 2 and increased
the contrast in just the highlights and left the mid tones and shadows
pretty much alone, producing Image 4. Notice that the overall image is
bright and snappy without the blocked up shadows that occurred in Image
3 when I increased the overall contrast. The ability to selectively make
changes in just the highlights, mid tones, or shadows is a great tool.
Black and white darkroom technicians do this all the time. It's
called selective contrast printing. They will print the highlights with
one contrast filter, then switch variable contrast filters to print the
shadows. There is no way to do anything similar to that when printing
color in a wet darkroom, short of contrast control masking. |
|||
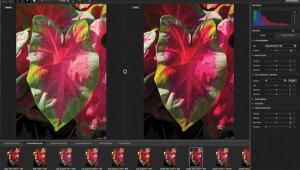
As I was studying Image 2, it became clear to me that the hot, dry weather of northern California had really taken the bright green color out of all the vegetation. I thought that the picture might look a little better if I could water the lawn and get the grass and trees to green up a little. So, with a few clicks of the mouse in Photoshop, I produced Image 6 with greener grass and greener trees. But, other than that, Image 6 is basically the same as Image 2. With a RA-4 color print, can you imagine how much time it would take to use wet dyes and try to add green color into those trees in front of that white building? I've done things like that for customers. It takes hours to retouch just one print. For Image 6, I brightened all that green up in less than two minutes on the computer, and could then make as many prints as I wanted at any size I wanted. Think of it as having retouched the negative. Imagine doing extensive color retouching on a 35mm color negative in two minutes. |
|||
All of these little image manipulation
tricks are easily done in just a few minutes with the computer. It doesn't
take hours of endless test printing and contrast control masking. In fact,
all six of these sample images were prepared for this article in less
than 30 minutes total, including the time it took to scan the original
color negative. I can't do things like that in a wet darkroom. Photoshop Advantages |


![]()
Get the Latest Photo Tips, News & Reviews from Shutterbug!
| Camera Reviews Other Reviews | Mobile Reviews Photography Reviews Columns | News | Features | How-To | Resources |
 © 2025 Shutterbug
AVTech Media Americas Inc., USA
All rights reserved