- REVIEWS
Camera Reviews 
More Reviews Mobile Reviews Photography Reviews - GALLERIES
- VIDEOS
- BUYER'S GUIDES
Birds on a Budget
|
You don't need a lot of fancy equipment to get good bird photos. Professional bird photographers do use some serious items (the 600mm f/4 supertelephoto lens favored by many costs more than my whole "bird" outfit, which includes both 35mm and digital AF SLR bodies), and you probably need similar gear and skills if you want to compete with them to sell your bird photos. But you can make lots of satisfying bird photos with far-less-costly gear.
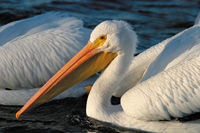
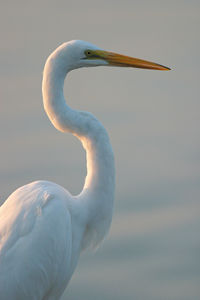
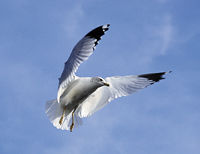
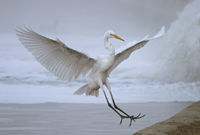
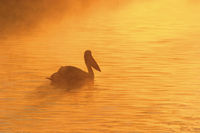
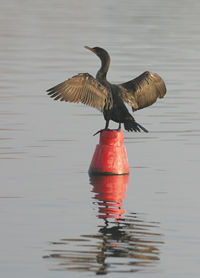
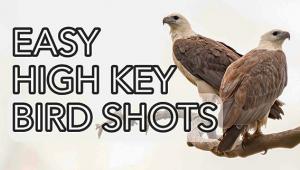
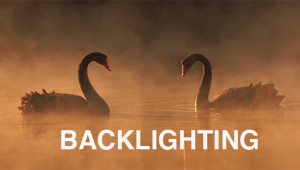
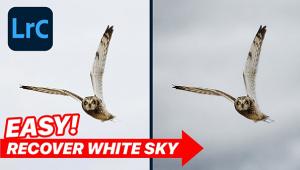
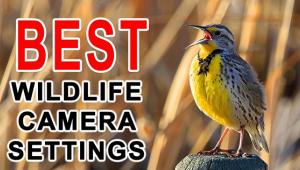
Being budget-minded, I do most bird photography these days with my digital SLR, because the cost per shot is far less than with film, and there are lots of "non-keepers" when photographing birds. The digicam also has the advantage of effectively increasing the focal lengths of my lenses by 1.6X, due to its smaller-than-full-35mm-frame image sensor (the 300mm f/4 image-stabilizing telephoto becomes a 480mm, the 200–400mm f/5.6 "economy" tele zoom a 320–640mm). But in the process of testing cameras for Photographic over the years, I've got good bird shots with under-$300 entry-level AF 35mm SLR cameras and under-$200 75–300mm or 100–300mm zooms, with and without low-cost 1.4X and 2X tele-converters, too. The pro gear is better, but not essential for enjoyable bird photos. The essential items include some patience, lots of practice, and a little knowledge (acquired from books or even better, from observing real birds). When I do shoot film, I like Kodak Ektachrome E100VS and Fujichrome Provia 100F and Velvia 100F, all pushed one stop to EI 200. For dimmer light, I switch to Fujichrome Provia 400F, the finest-grained ISO 400 slide film by a goodly margin, or Fujicolor NPZ 800 or Kodak Portra 800 color-print film. These are all "pro" films, but being budget-minded, you can get similar results with their less-costly "consumer" counterparts: Kodak Elite Chrome ExtraColor 100, Fujichrome Sensia 100 and 400, and Fujicolor Superia X-TRA 800. I almost always shoot in aperture-priority AE mode with the lens wide-open to get the fastest possible shutter speeds, because I prefer not to use a tripod. The bird pros generally work with their huge supertele lenses attached to a sturdy tripod, and use slow film, such as Fujichrome Velvia 50 or one of the ISO 100 slide films at ISO 100. Pro bird photographers frequently use high-end electronic flash units, sometimes with a Fresnel-screen flash-distance extender that lets them photograph subjects up to 100 feet away. Flash has its advantages (catchlights in eyes even on dull days, brief exposure times, and the ability to do night shots among them), but available light provides moods you can't get with flash...and it's free. I don't use flash. The best time to photograph birds is first thing in the morning. More birds are active then, and the sunrise lighting is beautiful (although even foggy mornings can yield moody images). The best place to find birds is probably a local park or lake. Here in the Los Angeles area, my favorite spot is a small recreation and fishing lake in a local flood basin (yes, right in the midst of the big city), where the wild birds are quite used to people. If you can't find birds to photograph, contact your local chapter of the Audubon Society for location suggestions. If you're really serious about bird photography, you might want to check out books on the subject by top pros such as Arthur Morris (www.birdsasart.com) and Tim Fitzharris, among others. 1. Bird Portraits If you have a yard, you can set up a bird feeder near a window, and photograph the critters that come by for breakfast (try to pick a site for the feeder that produces no window glare in the morning light). A feeder is about the only way to get portraits of smaller wild birds without very long lenses and lots of time to spend in the field. That's why I concentrate on larger birds (crow-size on up). For bird portraits, use single-shot spot AF, or focus manually; continuous AF mode will start to "hunt" if the bird moves slightly, causing you to miss shots. 2. In-Flight Shots To photograph a bird in flight, pick it up in the viewfinder (this alone takes some practice to master, especially with longer lenses), then move the camera with the bird to keep it in a constant position in the finder. Don't get discouraged if you can't do this at first...it does take lots of practice. It's not a bad idea to practice tracking birds with no film in the camera so you don't run up big expenses while getting the hang of it. With an autofocus SLR, use continuous AF mode, depress the shutter button halfway to activate the AF system, then press the button all the way a beat before the bird reaches the point at which you want to photograph it. It's very difficult to focus on birds in flight manually; if you have a manual-focus camera, you'll get best results photographing birds as they take off or land, or hover. Fast shutter speeds will sharply freeze the entire bird, slower speeds will freeze the body while blurring the wings, and even slower speeds will blur the whole bird. Once you get pretty good at tracking birds with the camera, experiment with different shutter speeds. Things happen too fast to check the background while you're shooting, but you can do it before you start. Check the lighting angle and the background, and if they aren't good, look for another camera location. A few tips: "Wings-up" shots are generally more attractive than "wings down," but that's mostly a matter of luck; it's almost impossible to "time" wing beats with most birds, so take lots of shots. You can try continuous advance mode, but that gets costly, and we're on a budget here. Try to find a spot where you can get some shots of the bird coming toward you (shots of birds going away from you are less interesting). Birds Being Birds All photos by Mike Stensvold |


- Log in or register to post comments


![]()
Get the Latest Photo Tips, News & Reviews from Shutterbug!
| Camera Reviews Other Reviews | Mobile Reviews Photography Reviews Columns | News | Features | How-To | Resources |
 © 2025 Shutterbug
AVTech Media Americas Inc., USA
All rights reserved