Automated Color Correction
Getting Idiot Proof Color Every Time
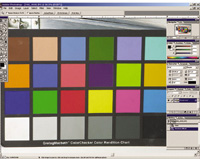
Here is a very easy and effective way to dial in accurate color on every outing. To do so you will need some basic tools. First of all, you'll need a camera that allows you to set White Balance manually. No, you don't need a "Set WB" control, just a means to dial in the basics: Daylight, Tungsten, Fluorescent, etc. Second, you'll need a color chart with black, white, and gray. I have alternately used the famed Macbeth Color Chart, as well as the small and inexpensive Kodak Step Wedge charts. I also have a small chart that I made myself that I always keep in my camera bag. It's three small paint chips from Benjamin Moore's paint sample charts. I chose the purest white, a neutral gray, and the darkest flat black. (Never use computer paper for setting white since it is often "blued" with bleach to look whiter.) |
|||
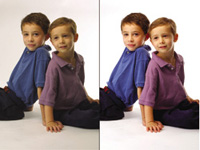
Here is the concept: For every distinct lighting condition in which you work you will create a "calibration image" first, using your color chart. You'll use your image-editing tools to set your black, white, and gray points, create a color adjustment file, then use that file to correct all the images you have shot. Sound complicated? If you're just out on the town banging off images it is in fact way too time consuming and complicated. However, if you plan to shoot a series of portraits or a set of images under identical lighting conditions you can use this technique for near perfect color. |
|||
How Digicams "See" Color |
|||
Here's a step by step guide to creating automatic perfect color. |


