- REVIEWS
Camera Reviews 
More Reviews Mobile Reviews Photography Reviews - GALLERIES
- VIDEOS
- BUYER'S GUIDES
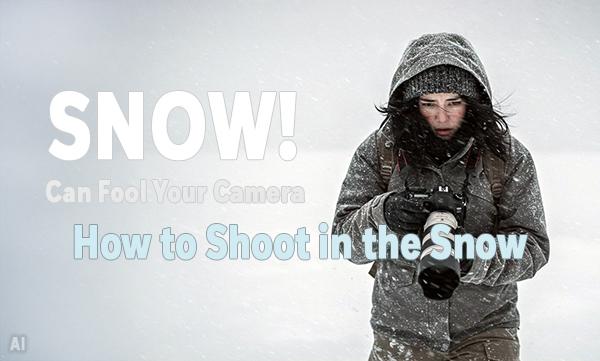
8 Tips: How to Get the Right Exposure in the Snow
If you live in a perpetually pleasant climate, go outside and mow the lawn or something. Save this story for later, like when you take that Alaskan cruise, or when the Earth's axis shifts 90 degrees. For the other 75% of us who experience cold, often snowy weather from December through March, here's how to get optimal exposure when the ground is all covered in white.

Snowblind
Here's the simplified, non-technical explanation we all learned at school—or at the local camera store when there were such things. The meter in your camera sets exposure based on the average brightness of the lightest and darkest areas of a scene. We call that "18% gray" (except in the UK where it's "18% grey") and it sits smackdab in the middle of the histogram.
Snow is so bright and reflective that it easily fools most cameras. Basing the exposure on the middle value frequently results in underexposure. Snow scenes have other complications, too; White Balance is often a mess, and the dynamic range of the camera can be taxed worse than a homeowner in New Jersey. And don't forget that snow can be a silent killer of cameras. More about that later.
Your camera may have a special "Snow Scene" mode. Cool. Try it. But be warned that the tips offered herein will likely do better when the fat flakes are falling.

1. Shoot Raw
Many people think that photos taken in Raw format are automatically better, but that’s not necessarily the case. However, shooting in Raw gives photographers an exceptionally high level of control over the final results.
For instance, you can make White Balance adjustments during post-processing instead of guessing in the field—and that's a critical advantage for snow scenes. The list of possible adjustments is very long and includes Color Grading, Vignette correction, Defringe, Clarity and Dehaze tweaks and ACR's new Adaptive Profiles. Even if you seldom or never shoot Raw, try the Camera Raw Filter in Photoshop to get a taste of what's possible.
Bonus Cool Benefit of Raw
Many camera manufacturers provide editing/decoding software that works with their Raw image files. In most cases, you can invoke the Special Effects options offered by the camera. It's much more convenient (and clear-cut) to decide to use a certain creative effect during post-processing instead of being committed to the decision you make in the field—which is what happens when you shoot JPGs.
2. Use Base ISO
Your camera has a Base ISO that is optimized for normally-lit subjects. It's usually ISO 100 or ISO 200. Instead of following the common advice that recommends you "use a low ISO," use the Base ISO. A sensitivity setting below base can create images that have objectionably high contrast.

3. Bracket Exposures
Nearly all cameras, including many aging point-and-shoots, have some form of automated bracketing. When set to Bracket, the camera makes consecutive exposures based on the parameters (number of exposures and change in exposure) you select. With one snap you can get -2, -1, 0, +1 and +2 corrections, five in all. Using a tripod is recommended, and it doesn't work with moving subjects for obvious reasons.
If your camera does cannot bracket by itself, manually bracket by shooting underexposed, normally exposed and overexposed images. That's how we did it in the old days.

4. Overexpose & Chimp
No time to bracket? Or too lazy? Overexpose and chimp. "Chimping" is the mildly disparaging term photographers apply to people who check the LCD after every shot. If bracketing is not an option, overexpose the scene and examine the results. Trial and error gets you to the right place.
5. Shoot HDR
HDR (High Dynamic Range) photography has a purpose and life of its own, but it also has an application in snow photography—in fact, in any situation where there are strong components of very bright and very dark elements. Many cameras have automated HDR setting; with others you must bracket and compile the HDR in post.
What the Heck is HDR?
Here's a simple example. Instead of one shot of a scene that has very bright highlights and very dark shadows, the HDR scenario captures one or more images based on the exposure value of the shadows, one or more images based on the highlights, one based on the average, and then combines all of the data to render the best overall exposure. Sometimes. Other times it's just a goofy looking high contrast image that looks like crap. But no matter, because the camera saves the intermediate images in addition to the one it compiles. So in a very real sense, the automated HDR setting equates to excellent bracketing technique.

6. Use an ND Filter
An ND (Neutral Density) filter limits the amount of light it passes to the sensor without adding color, contrast, saturation or any other bad stuff. An ND filter with a value of 0.3 (sometimes called an "ND2") reduces exposure by one f/stop, i.e., by 50%. A 0.6 ND (ND4) by two f/stops. Buy both flavors; when you stack them together you have an ND8, 0.9, and that cuts three stops. That's a pretty good kit.
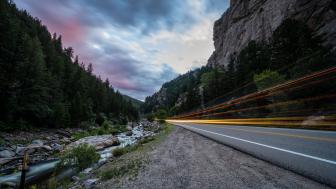
Aside from snow piles, ND filters are useful any time you want to use a shutter speed slower than the scene permits—catching the full motion of a flowing waterfall, for example. Or at the beach when the camera asks for 1/8000 sec at f/22 at ISO 100.
7. Try a Graduated ND Filter
What if the sky is beautifully blue but the foreground is too bright for a decent shot? Graduated ND filters have a gradient of density that starts very dark at one end and becomes less dark until it reaches transparency at the other end. Often these are rectangular to provide more control, and require a filter holder. Slide the filter up and down in the holder to correctly position the horizon.
If you think this might be for you, check out this Cokin set that's sold by B&H Photo. It contains 0.3, 0.6 and 0.9 graduated ND filters, three in all, and a Cokin filter holder. Unless you're already into Cokin you'll have to buy an adapter ring—but that’s actually a plus. If you own lenses with different filter thread sizes, you can use the same filter set with all of them just by buying the right adapter. Much better than having to buy multiple filters.
If you're tempted by the Cokin-type knockoff filters sold online for less than the price of a peanut butter sandwich, get over it. I tried them for you. The samples I tested were very inconsistent in density and quality, and many were not plano-parallel (that is, they were thicker at one end than the other) a huge no-no for decent optical performance.

8. Polarizers Cut Exposure by at Least One Stop
The polarizing filter you may already own is by accident an ND filter. Although the specifications change from brand to brand, you can count on at least one f/stop of light reduction (0.3 or ND2 equivalent) and often more. Okay, there are a couple super-expensive polarizers that absorb only 2/3 of a stop, but most are in the 1 to 2 stop range.

DANGER: Fear Precipitation Like its Rabies and You're a Puppy
Words like “Splashproof” and “Weather Resistant” make us think an electronic device is super safe in any weather, but we might be overthinking it. These vague terms, which are marketing hyperbole, assume that everyone uses their products in a smart way.
I’m not convinced. I’ve seen too many products ruined by poor usage choices. Don’t just believe the advertising hype. Take a closer look at the facts and separate the truth from the exaggeration. Learn the science behind it all.
International Standard IEC 60529 delineates the criterion to measure a device's resistance to the ingress of solid foreign particles (dust) and water under various conditions. To be certified, a product must be tested by an approved lab. Learn the IP ratings of your cameras and lenses. Call the manufacturers if necessary. You might be surprised in an alarming way, which is way better than a "it's too late, dammit" disastrous way.
This story more fully explains the meaning behind the IP rating scale: Is Your Weather Resistant, Splashproof, Waterproof Camera Impervious to Water & Dust?

SNOW! How to Capture it Accurately in the Camera (VIDEO)
How To Have Photo Fun In The Winter
BOUDOIR Photos in the Snow? Here’s How (VIDEO)
Is Your Weather Resistant, Splashproof, Waterproof Camera Impervious to Water & Dust?

AI Acknowledgement
Plenae revelationis. All images illustrating this article were created using AI software from Remix, ImageFX and/or Adobe Firefly. Which begs me to say that when accumulated snowfall exceeds your height, and temperatures are in the teens, stay home and make some AI creations instead of venturing outdoors. They're not photos, and they're not really even art, but they are fun, and they provide good fodder for post-processing practice.
If You Enjoyed This Article
Click here to choose from more than 550 reviews, how-to articles, quizzes, attempts at humor and other alleged insight into the world of photography written by yours truly.
Join the Shutterbug Community!
Sign up for a free account. It’s easy and free. Subscribe to our newsletter (see sign-up form on our homepage) and bookmark Shutterbug as a Favorite on your browser so you can check back often. Visit our Gallery section and spend five minutes or less uploading your best shots once a week or so. You may even become a Shutterbug Photo of the Day photographer. In the Galleries you'll see the amazing work of thousands of photographers from all over the world. You are invited add your photos to our ever-growing collection. It’s a great way to connect with other photographers and share your knowledge and passion for photography.
—Jon Sienkiewicz


![]()
Get the Latest Photo Tips, News & Reviews from Shutterbug!
| Camera Reviews Other Reviews | Mobile Reviews Photography Reviews Columns | News | Features | How-To | Resources |
 © 2025 Shutterbug
AVTech Media Americas Inc., USA
All rights reserved