The 21/4 Square Format
It Is Big Enough To Be Almost Whatever You Want It To Be

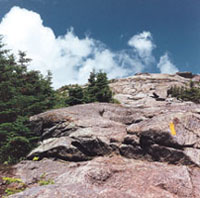
There are times when you just haven't the heart to crop. Everything in the full negative seems to belong there. Actually, the negative has several possibilities. The yellowish slash marks the easiest climbing route to the very top of Cascades in the Adirondacks.
Photos © 1999, Mike Matzkin, All Rights Reserved

The 6x7 negative or transparency is considered the ideal format. Bigger is better. There's less of a grain problem when you make big prints from fast film. In black and white the bigger negative also means an expanded gray scale. It's easier to dodge or burn in and you get that rich looking print with less effort than with 35mm, lets say. Okay, I agree with all that to a point, but after years of shooting with 21/4x21/4 I think its the true ideal format.

The 21/4 square negatives are big enough to provide the expanded gray scale, less worry about grain, and really great looking color--with negative or transparency film. I still remember the first time I projected a 21/4 square slide. It was a revelation. It had tremendous impact, great color, and wonderful sharpness--and all that with film that doesn't come close to the emulsions we have today. The square format also means tremendous cropping freedom--vertical or horizontal. That's not to denigrate other medium formats. For a great many photographers 6x7, for example, meets their needs. It's simply that the square negative fits my medium format needs.

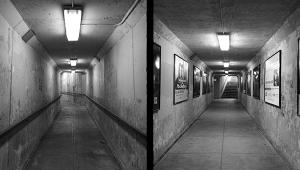
Cropping the top part of the negative created panoramic effect. If you anticipate a panoramic print, it might be a good idea to use a tripod for maximum sharpness. However, often enough the panoramic effect suggests itself after the negative is processed and contact printed.

My first 21/4 was a Rolleiflex with a Schneider Xenar lens, not considered as good as the Zeiss Tessar on the more expensive model. It worked for me. While I do shoot 35mm and even 4x5, I still return to the 21/4 format because of its flexibility. These days I've added a Hassleblad to the two Rolleis I now own and shoot with all three, but I certainly don't limit myself to the square format. The square format is the basis for any format I choose.

For me the 21/4 squares spell freedom. It makes it possible to break loose from the limitations of the conventional negative or transparency format. In the darkroom or in cooperation with my custom color lab printer, Jim Lammar, I've got a virtually unlimited format range--whether it's the entire square format or whatever way I think the image will look best. Just about every image has a print size and shape that works for it. I let the image itself dictate the shape and print size. I have always rebelled against the conventional paper sizes--black and white or color. They figuratively--and literally--put you in a box. While a lot of my black and white prints are full 8x10 or 11x14, there are times when I fill only a portion of the paper to create the size and shape I want. It might mean using an 11x14" or 16x20 sheet of enlarging paper to make the print size. The rest is trimmed away. Also, I usually shoot with total disregard for what is considered good light and load with fast emulsions that meet the exposure challenges of a wide variety of light. Fast films seem to have more exposure latitude than slower emulsions. The 21/4 format is large enough to make excessive grain a minor consideration with today's finer grain film. You'll be able to make large prints--16x20 or even larger--without much of a grain or sharpness problem even from relatively small areas of the overall negative. For bigger prints and where the light is good I may switch to slower emulsions to be on the safe side. I photograph handheld or with a tripod. The tripod is insurance for really sharp images. It also helps with getting the image you want. With any format the tripod-mounted camera leads you into really studying the image carefully before you make an exposure. It's a teacher and creativity tool that's especially important if you plan on cropping the image.

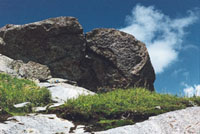
With a lot of unwanted detail surrounding the rock outcropping on top of an Adirondack peak, the image was cropped tightly to focus viewer attention.

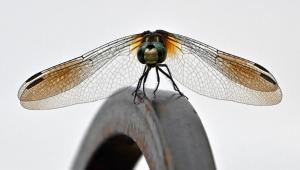
I've made prints from the center of a negative, cropping down to something only slightly larger than 35mm. I own only one lens for the Hassleblad since I still haven't won the lottery. The overall image size makes my one lens pretty flexible. I crop tightly for close-ups and sections of an overall landscape. As I said earlier, I feel restricted by conventional paper sizes and/or film formats. The square format sets me free. I may decide on a horizontal or vertical format when I make the exposure, or I look at the contact sheet and try to decide the shape of the print. In the darkroom I follow the crop as closely as possible. One negative might even yield two or more print ideas. The square image itself may be the perfect format.

Fritz Henle, who shot almost exclusively with the twin lens Rolleiflex and later with the single lens Rollei, used the square format extensively in his prints--everything from landscapes to portraits to nude studies.

Panoramic images are making a strong comeback, but dedicated panoramic cameras can be a bit pricey--even at the low end. The square format lends itself neatly to making panoramic format images. The negative or transparency is enough to allow tight, horizontal cropping for a 6x17 or 8x20" or larger print size.

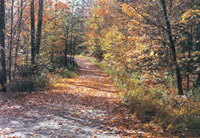
This image could have been cropped as a vertical or horizontal. The vertical cropping emphasized the Fall color and the trail leading into the woods.

There are two obvious ways to handle the paper for the final image size in printing a panoramic format from a 21/4 square negative. You can print the entire negative and then cut the image to size on your trimmer, or cut the paper to the desired size before you make the print exposure. I use both systems. With the first I may be searching for the image area I want to use and the exact size of the final print. An Art Director taught me trimming board cropping. Often I make the print and then start trimming until I see the image I want.

The second way is more economical and works when you know precisely how the image is going to look. It does take a bit of practice to relate crop marks on the contact sheet to the exact print size when you enlarge for the panoramic format. I use a bladed enlarging easel and a borderless easel when I need a bit more room. I also like the look of the borderless print for many of my images no matter what the shape.

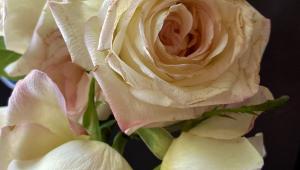
Originally this image was photographed with a horizontal print in mind. The contact print made other suggestions.

Getting started with the square format can be expensive--but not necessarily. You never know what you'll find on a camera store shelf. I walked into a local camera store and found a used Hassleblad 500C for under $1000. Still not cheap except by comparison to a newer much more costly model. TLRs can be a lot less expensive. In addition to Rolleiflex, Minolta, Yashica, Mamiya, and others produced pretty good TLRs. In fact, those TLRs were the first break from the Speed Graphic. News photographers and photojournalists found themselves with a camera that was faster, lighter, more maneuverable, and relatively inexpensive.

A little searching in the mail order ads in this issue just might turn up a used camera bargain for under $200. Shutter speed is limited to 1/300 sec, but for most photography that shouldn't be a problem. I have no idea of the quality or how sharp the lens, but the camera has been around for a long time. It might work for you as an entry-level machine. As with all mail order buying, find out about the return policy.

The square format opens up all sorts of creative possibilities and may add another dimension to your photography. It can certainly set your imagination free and provide a new way to look at image making.

X