- REVIEWS
Camera Reviews 
More Reviews Mobile Reviews Photography Reviews - GALLERIES
- VIDEOS
- BUYER'S GUIDES
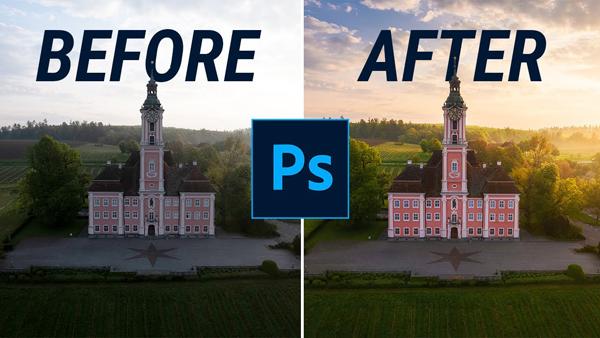
This is Why HDR is the Key to High-Contrast Photos (VIDEO)
One of the biggest challenges faced by landscape photographers is arriving at a proper exposure when shooting scenes with a wide-range of tones that exceed the dynamic range of their cameras. In such cases conventional camera-settings or editing methods may not be up to the task.
The video below from the PHLOG Photography YouTube channel explains how using HDR techniques with Photoshop provides an effective solution for transforming unbalanced photos into truly epic images.
German landscape photographer Christian Mohrle pulls up a photo of a pretty scene that perfectly illustrates the problem: Shoot for the highlights and the dark foreground get crushed. Conversely, if you shoot for the shadows (or edit with standard techniques) the sky will be blown out.

That pretty much explains why HDR is so important for rehabilitating images like this, and Mohrle walks you through a straightforward method for getting the job done. We recommend downloading his Raw file via the link in the description beneath the video, so you can make his recommended adjustments while watching the episode.
Mohrle’s primary goal is to achieve a nice balance between highlights and shadows in the photo, but he also wants to correct a few skewed lines, and add a bit of glow to the shot. He begins with some basic adjustments so the image looks as good as possible for the transformative enhancements that follow.
The first step is changing the profile to Adobe Standard for more base saturation. Mohrle then adjusts exposure to the degree possible, and modifies White Balance to give the entire image a warm Golden-Hour appearance. The final basic adjustment is slightly dropping Clarity and Dehaze to create a “dreamy” mood.
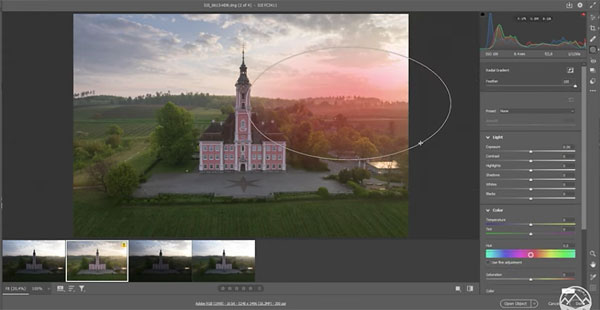
The meat of the lesson now begins with a Color Range Mask targeting blues in the sky, a linear gradient at the top of the image, and a Select Subject Mask to brighten the center of the shot. For the glow on the right he employs a large radial gradient to add the orange tones while bumping up the blacks.
Next comes some simple color grading using Photoshop’s Color Mixer, a bit of Split Toning, and a Luminance adjustment to further darken the sky. Careful sharpening is also applied. All that’s left is fixing skewed lines in the foreground.
You can find more lessons on shooting and editing landscape photos by taking a visit to Mohrle’s instructional YouTube channel. And don’t miss the powerful tutorial we posted recently from another image-editing expert, explaining a surprising reason that your landscape photos may not be consistently sharp.


![]()
Get the Latest Photo Tips, News & Reviews from Shutterbug!
| Camera Reviews Other Reviews | Mobile Reviews Photography Reviews Columns | News | Features | How-To | Resources |
 © 2025 Shutterbug
AVTech Media Americas Inc., USA
All rights reserved