- REVIEWS
Camera Reviews 
More Reviews Mobile Reviews Photography Reviews - GALLERIES
- VIDEOS
- BUYER'S GUIDES
Want Photos with PRECISE Color & Contrast? Do This in Photoshop (VIDEO)
Experienced landscape photographers know that accurate colors, the right amount of contrast, and the proper use of light greatly contribute to the success of an image. Unfortunately, conditions in the field sometimes make it impossible to attain these goals in the camera. That’s when it’s time for a bit of Photoshop magic.
The video below from German pro Christian Mohrle demonstrates a straightforward method for making a truly remarkable transformation. As with all of his tutorials we strongly recommend using the link beneath the video to download his demonstration photo so you can make the necessary adjustments yourself as they’re explained.
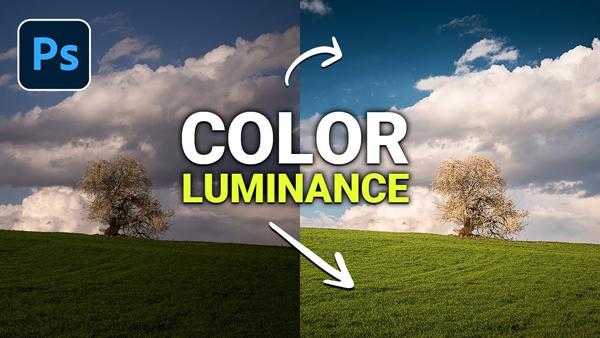
As you’ll see, Mohrle’s sample photo is dark and devoid of contrast and vibrance throughout the entire scene. His goal is to “make the photo POP” through the judicious use of Photoshop’s versatile Color Luminance tools. We’re sure you’ll be impressed with this simple edit—especially after viewing the before/after images.
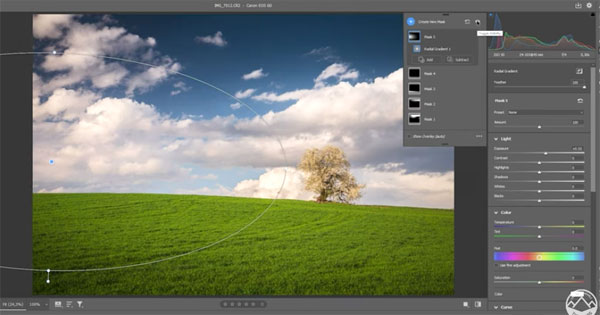
Mohrle begins with several basic global adjustments to make the photos look as good as possible for the selective enhancements that follow. He first changes the profile from Adobe Standard to Adobe Landscape, which provides more base saturation. He then opens Photoshop’s Basic panel for further adjustments.
Simple modifications to White Balance make colors look a bit more natural. Then Mohrle raises overall exposure, drops highlights slightly for more details in the clouds, and increases Texture and Clarity. After upping the Vibrance, it’s now time for the final transformation to begin.
Mohrle’s makes the selective enhancements with a Luminance Masking technique, designed to improve contrast. He does this by targeting specific colors within the scene, making some brighter and others darker until he achieves the look he wants.

With that out of the way Mohrle further adjusts color with HSL tools and makes use of Photoshop’s Color’s Mixer to refine what he’s done. Now all that’s left for the final transformation is a bit of sharpening and cleanup. Impressed?
There’s much more to learn by visiting Mohrle’s instructional YouTube channel, so be sure to pay a visit and subscribe.
And don’t miss our recent post explaining how to grab a bunch of Adobe Creative Cloud freebies, including tools for creative effects, streamlining your workflow, and much more.*


![]()
Get the Latest Photo Tips, News & Reviews from Shutterbug!
| Camera Reviews Other Reviews | Mobile Reviews Photography Reviews Columns | News | Features | How-To | Resources |
 © 2025 Shutterbug
AVTech Media Americas Inc., USA
All rights reserved