- REVIEWS
Camera Reviews 
More Reviews Mobile Reviews Photography Reviews - GALLERIES
- VIDEOS
- BUYER'S GUIDES
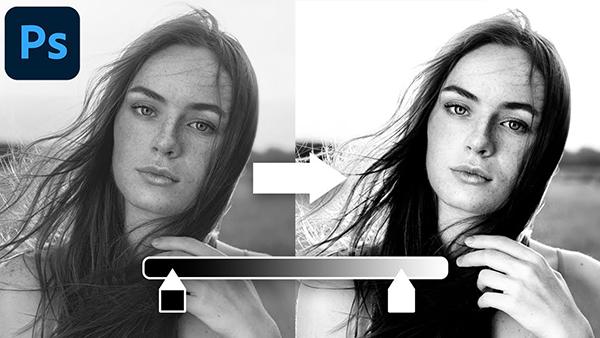
The Secret to Creating Dramatic B&W Photos in Photoshop (VIDEO)
Earlier this month we featured a tutorial explaining a Lightroom technique for editing b&w photos to achieve maximum impact. The quick tutorial below takes a similar approach for all of you Photoshop users.
Instructor Brendan Williams specializes in straightforward image-editing tutorials designed to help others simplify and master daunting Photoshop techniques. It you're tired of flat and boring monochrome photos, this seven-minute episode will quickly set you straight.
Eye-catching contrast and effective tonal separation are the hallmarks of dramatic b&w images, and flat is definitely not where it's at. The most basic approach is simply going to Photoshop's Adjustments panel, employing a b&w adjustment layer to strip color out of an image, and then using sliders to modify the Luminance values of individual color channels to add or subtract contrast.
But the easiet methods rarely deliver the goods and Williams explains the problem like this: "What you get is a very basic and uninteresting effect." In other words, there's a much better approach, and Williams explains how to add maximum impact and drama to b&w photos in less than seven minutes.
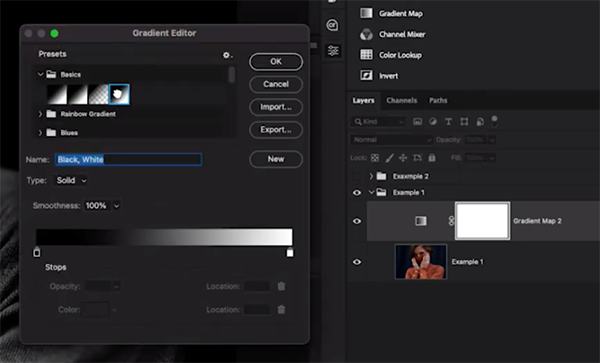
The first step occurs in Photoshop's Adjustment panel where Williams makes a Gradient Map layer. Once this layer is created inside of the Properties panel, Williams then clicks on the Gradient preview, opens the Basics folder, and makes sure to select the B&W Gradient option.
Initially the effect may appear far too intense, but that's easily rectified by following Williams' instructions to adjust how the Gradient blends into the image. There are a few options available, and this is how they work: Choosing Perceptual will provide the most intense contrast, while Linear is a lot softer (therefore brightening up the effect). The Classic mode delivers results that fall somewhere in between
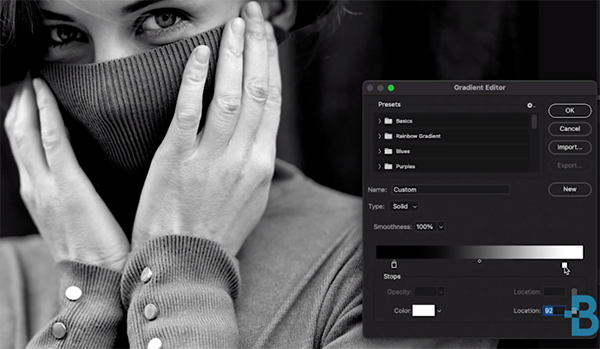
Once you make your choice and evaluate the image you can still use your Gradient Map to further refine the effect until it perfectly suits your fancy. With Williams' first example, created in the Linear mode, he further accentuates Contrast by opening Photoshop's Gradient editor and adjusting color stops to change the intensity of shadows or highlights.
Williams provides other examples, using different modifications, as the video proceeds. All this requires a bit of experimentation because every photo is a bit different as is the approach you'll take to create the proper amount of Contrast and the specific values of highlights and shadows in the image.
There's much more to learn by visiting Williams' instructional YouTube channel, so be sure to take a look. And don't miss the Lightroom tutorial mentioned above, explaining how to use that software to create incredible b&w photographs.
- Log in or register to post comments


![]()
Get the Latest Photo Tips, News & Reviews from Shutterbug!
| Camera Reviews Other Reviews | Mobile Reviews Photography Reviews Columns | News | Features | How-To | Resources |
 © 2025 Shutterbug
AVTech Media Americas Inc., USA
All rights reserved