- REVIEWS
Camera Reviews 
More Reviews Mobile Reviews Photography Reviews - GALLERIES
- VIDEOS
- BUYER'S GUIDES
Playing With Pixels
Digital Imaging And The Wildlife Photographer
Just a few years ago, serious
wildlife photographers would not be caught dead without a set of telephoto
lenses, camera supports, a selection of medium speed and fast films,
polarizing and warming filters, flash with a flash extender, and perhaps
a photographer's/hunter's "blind" in which to
hide. |
|||
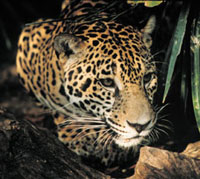
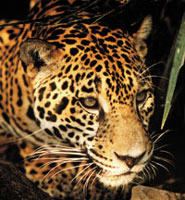
Jaguar, Belize, Central
America, In Captivity. Check out the original scan. It's
rather dark and a bit flat because the animal was photographed in the
shade. Plus, you really can't see the animal's eyes--a key
element in wildlife photography. The jaguar's head now dominates
the frame. |
|||
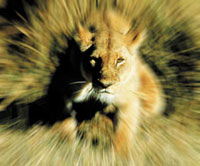
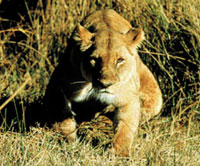
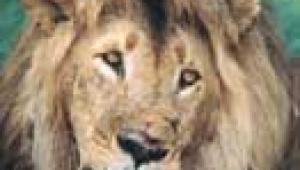
Lioness, Botswana,
Africa. I liked the original shot. However, I wanted to create
an image that leapt off the page. |
|||
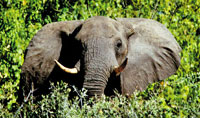
Elephant, Botswana, Africa. Se-veral digital effects were used to create the final image. Most noticeable is the removal of the distracting branch in front of the elephant's trunk, which was easily accomplished using the Rubber Stamp tool. I simply cloned adjacent parts of the animal's trunk and placed them over the branch. |
|||
Using Curves, I pulled out
the highlights in the animal's left tusk. Note the difference. |
|||
Using the Crop tool, I cut
off some of the brush area that surrounded the elephant--adding more impact
to the picture. |
|||
Editor's Note: Rick Sammon took the lioness and elephant photographs for this article while shooting three episodes of the ESPN Canon Photo Safari in Botswana, Africa in 1999. Safari arrangements were made by Afro Ventures (www.afroventures.com). The jaguar was photographed in captivity during the shooting of the ESPN Canon Photo Safari in Belize, Central America in 1998. Belize travel arrangements were made through the Belize Tourism Board (www.travelbelize.org) Botswana pictures were shot on Kodak Elite Chrome Extra Color 100; Belize shot was taken on Elite Chrome 200. Adobe Photoshop Corel Draw 8 Wright Design |


![]()
Get the Latest Photo Tips, News & Reviews from Shutterbug!
| Camera Reviews Other Reviews | Mobile Reviews Photography Reviews Columns | News | Features | How-To | Resources |
 © 2025 Shutterbug
AVTech Media Americas Inc., USA
All rights reserved