Panorama Power
How To Shoot & Stitch A Panorama With Any Camera
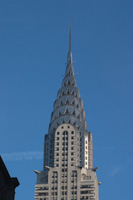
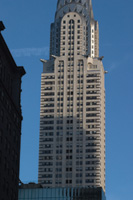
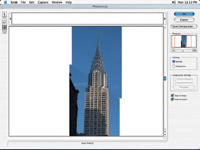
Want to add a new dimension to your photography? Try shooting panoramic pictures--shoot a series of two or more frames and then combine them digitally. The wide sweep of the panoramic format captures attention, adds impact, and compels viewers to look more closely at your images. Plus it's a lot of fun and works with virtually any camera. You can also use these techniques to shoot and compile panoramas from scanned film images or prints. To combine a series of photos you've shot into a panorama, you can use the automated Photomerge feature (shown here) in Photoshop Elements 3 or the new Photoshop CS. Other modestly priced panorama software is listed at the end of this article. |
||||||
Increase
Your Pixel Power Think Wide |
||||||
You can shoot panos handheld, but the images will be easier to stitch together later if you put your camera on a level tripod. If you're using a zoom lens, don't change the zoom during the series of photos for the pano. Take an exposure reading for the most important subject area and, if possible, lock the exposure, focus, and white balance settings, or set the camera to manual. This way, the exposure and focus won't shift between pictures. If they do, one photo in your pano may be darker than the next, with bands where the component images join. Don't worry, though, if your camera does not allow you to lock the settings. Most cameras will give you fairly consistent results, and you can correct exposure changes later in the software with levels and the clone stamp. |
||||||
Practice Makes Perfect |
||||||
Establish a routine and follow it. If you always shoot the sequence from left to right, for example, you'll easily know where each component image fits in the panorama. As you pan the camera between shots, stop when you still have 1/3 of the previous image in the frame. Continue to shoot and repeat for as many frames as you want. Try to complete the sequence smoothly but quickly in one series of shots so that the lighting and weather conditions don't change. Don't turn the camera on and off in between as this can change the white balance and exposure. If you are combining several images, say four or more, try combining two first, then adding one to that combination, and so on. Some cameras come with a panoramic mode. This helps you compose and guides you through the overlapping. If you don't have a camera with this feature don't fret, as following the techniques I've outlined will get you going; if you have such a feature use it, as it's a great aid in the work. |
||||||
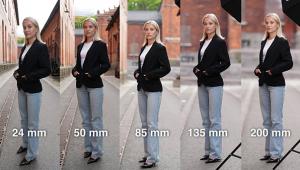
While you might think that wide angle lenses would be great for panos because they take in such a wide field of view, in most cases you'd be wrong. Very wide angle lenses might show strong distortion, especially at the corners and edges of the frame, making it next to impossible to stitch images together. An exception is special rectilinear wide angle lenses that may be used with interchangeable lens cameras like digital SLRs. You'll have the most success at stitched panoramas with the equivalent of a 35mm lens (on a 35mm format camera), normal or tele lenses or zoom settings. Normal to tele yield the least distortion and the best final results. |
||||||
For more information on Elements 3 and Photoshop CS, see www.adobe.com. Additional panoramic software priced under $100 includes: PhotoVista Panorama 3.0 (Win and Mac), www.iseemedia.com; PanaVue ImageAssembler (Win only), www.panavue.com; Realviz Stitcher EZ (Win and Mac), www.realviz.com; Canon includes PhotoStitch software (Win and Mac) with some of its cameras, www.usa.canon.com. |
