Master Class
Shoot Outside All Day Long

Master Class

Photos © 2002, Monte Zucker, All Rights Reserved

Sure, it's nice to shoot outside just before sunset with the "sweet light." But it's just as nice to be able to shoot all day long. That's what I wanted to prove recently in my class in Whitewater, Wisconsin.

We went outside early in the morning for a family group that ended with individual portraits of each of the children. This young boy wasn't exactly thrilled to have his portrait taken in the first place, but when we put him up in the tree he felt a little better about the whole deal.

With the early morning bright sun coming in on him from behind I could deal with it, because most of him was in the shade. I simply cropped in close to avoid some of the bad hot spots and used a silver reflector, camera right, to shape his face. That avoided what would otherwise have been a flatly-lit portrait of him.

In Photoshop I made a few corrections to refine the finished picture. Since we couldn't get high enough to put the reflector above his eye level, the main thing that I did was to move the catchlights in his eyes up to 1:00. I also toned down his bright left arm and ear, keeping your attention glued right on the mask of his face.

Early morning sun can be the main light for a portrait, too, especially when softened through a translucent diffusion panel as I did for this picture of a young couple.

I simply had two of the photographers in the class hold my 4x6 ft panel overhead for beautiful, direct lighting onto the two of them. Nothing is washed out. The detail throughout the portrait is incredible. You just take a meter reading with the panel in place. Just look at the detail from the bright highlights on her hair to his shadowed face.

The only thing that I did for this portrait was to tone down the grass a little in Photoshop.

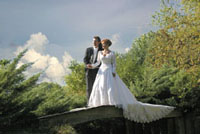
Another mid-morning sun picture was this couple on the bridge.

I used the direct sunlight as if it were the main light on the bride and groom. To open up the shadowed areas I placed a strong flash at the end of the bridge--almost directly in front of their faces. It was a perfect fill light, wrapping the light around them.

The sky was cloudless. Afterward I put in some light fluffy clouds, keeping them toned down, so that they would not compete with the couple. I put in the clouds by "selecting" the sky in Photoshop using "Select/Color Range." Then I put the background behind them by picking a cloud pattern from my ever-growing collection of cloud pictures, using "Select All/Place Into."

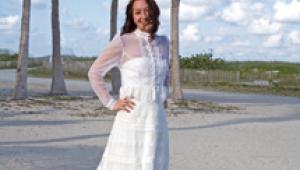
One of my favorite techniques for creating portraits outdoors is to place my subjects in the shade and shoot out toward a brighter background. I did exactly that later in midday, positioning my lens where it would place her shaded profile against a plain, lighter background. The exposure was for where she was standing. I let the background go overexposed. I did darken the corners of the portrait later in Photoshop.

The shaded area in which she was standing was full of bright splotches of light coming in through the trees. It was a simple matter to again place my translucent panel in a position that would cut out the unwanted highlights and keep the light on her gown even. What a beautiful way to show all the detail in her dress. The back profile pose was the only way in which to show all of that train. It couldn't have been photographed that beautifully in the studio, because there just wasn't enough room inside to spread her gown out like that.

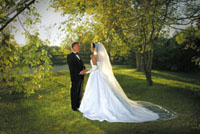
Any time you can find low-hanging backlit tree leaves you've got it made. I love placing subjects inside those backlit leaves, shooting out to the brighter light. This seemed to be a good place to demonstrate that with the bride and groom who were posing for our class.

I located my camera position very carefully, placing their profiles against a simple background. I exposed for the ambient light within the shaded area, adding a flash to my extreme left at the same f/stop as my exposure. This opened up all the detail in their faces and gave shape to the train of her gown. The backlighting of her veil was the natural sunlight filtering through.

Finally, to finish off the image I burned in the foreground and both corners in Photoshop by adding a duplicate layer. I darkened the entire image by bringing down the lighter side in Curves and erasing the center section of the darkened area 100 percent, continuing out to the sides in lesser increments of erasing.

As the sun lowers in the sky it's possible to use it as the main light without having your subjects squint their eyes. That's what I did here, placing her close to the camera and showing part of Whitewater Lake behind her. With her figure so large in the picture she still dominates the scene, even though the background is so pretty.

Since there was the same amount of light on her as there was on the background, it was a no-brainer. No extra lighting was necessary...well, almost no extra lighting. I did place a light behind her to backlight her veil. It was set to match the f/stop.

In Photoshop I opened up the contrast on some of the darker areas behind her.

As long as there's light you can keep taking pictures. That's what I've found out now that I'm shooting digital. With a simple dial on the camera it's possible to push the "film" up to ISO 800, 1000, or better. My results have been spectacular--even in prints up to 16x20!

This portrait was taken so late in the day everyone had just about put their cameras away. We were even within a group of trees when I spotted the light coming around onto this photographer's face. There was also a rather large opening in the trees in front of him for a fill light.

All I needed to do was to pick up a little of the very late, direct light coming around on the right side of his face and wrap it around onto the left side of his face with my reflector. The reflector, then, became my main light onto his face. Once again, I toned down the edges of the photograph in Photoshop. The rest was as-is.

On the last day of the class our hostess, Michele Gauger, was preparing for a hunting trip. She came out all dressed for action and that's exactly what we did. We went into action, taking her out into her back yard. The light was extremely low both in its angle and in quantity. That didn't bother me. As long as I could place her among the trees with open sky behind her to light her face, I knew we'd have it made.
Seeing the light is all it takes. Once you begin to see it and realize from where it's coming, it's an easy thing to position your subject to the light. Just the reverse of what you do in a studio environment, where you position the light to suit the subject.

Of course there was some darkening in Photoshop of the areas surrounding her face, but isn't that what we used to do in the darkroom, anyhow? It's just a lot easier doing it now on our computers.

Very late in the day we went back to the same bridge where we had posed the bride and groom much earlier and in full sunlight. This time we placed the setting sun directly behind the bride for backlighting. I exposed for a semi-silhouette, getting just a little detail in the faces and in her gown.

When you set something like this up against a clear sky it's so easy to "select" the sky with "Select/Color Range." Then, when I got home I looked at some of my clouds-in-storage and picked what I thought might make this look like a romance novel cover.

The final touch was to pick up some color from the background and overlay it on top of the entire image. This color-keyed the entire picture to the color and mood of the sky behind them.

Is it fair to use Photoshop for all the touchups? Hey, don't you think Ansel Adams would have done the same thing had it been available in his era? Don't you ever wonder what all of his incredible images might have looked like before he did his magical work to them? No different here. With what we have and what we know you can see how wonderful it is to shoot all day long...from sunup to sundown. There's never a reason to wait until the end of the day to do portraiture.

All of these photographs were made with my Canon D60. Yes, I'm 100 percent digital and have been for ages! My translucent panel is by Westcott. Flash and flash transmitter are from Quantum. Titanium tripod by Sunpak. "Filters, vignetters, and special effects" by Photoshop.

You can see much more of all of these techniques on my web site: www.zuga.net.

X