How To Use Extensis Intellihance Pro 4; Single Click Image Fixes

Extensis Intellihance Pro 4.0 offers single click solutions for many common photo-editing problems. Intellihance also features a powerful preview mode that enables you to preview up to 24 different enhancements from one convenient window.

Installing Intellihance Pro
Although Intellihance is advertised as a plug-in for Adobe Photoshop and Corel Photo-Paint, it worked with every photo editor that I have tried, including Ulead PhotoImpact XL, Jasc Paint Shop Pro 8, and Macromedia Fireworks MX 2004. The installation wizard will guide you through the steps of installing for Photoshop or Photo-Paint. Once installed, Intellihance Pro will be available in your photo editor's Filter or Effects menu.

#1. Intellihance Pro in its Default mode. A single image is displayed, with the Quick Enhance adjustment applied.
Photos © 2003 Anthony L. Celeste, All Rights Reserved

The Intellihance Pro Interface
When you use Intellihance Pro for the first time, it will display a single copy of your photo, and apply the default Intellihance adjustment, called "Quick Enhance." When you use Quick Enhance, Intellihance examines the image and automatically applies up to nine filters to enhance the image's quality (#1).

Although this single adjustment will be enough for some photos, the true power of Intellihance Pro comes when you use it to preview multiple copies of your photo, each with a different adjustment applied. To do this, click the Layout menu, and then select a layout. Then click the View menu, and select Repeating Image.

#2. Intellihance Pro in 3x3 layout with repeating image view.

I frequently use the 3x3 layout, since this allows me to place the original image in the middle windowpane of the 3x3 grid, and surround it by a total of eight preview windowpanes, each containing a different adjustment. Note that you can go as high as the 5x5 layout, and still not have any preview panes showing the same adjustment, since Intellihance Pro makes the original image plus 24 different adjustments available every time you preview an image (#2).

To the right of the preview windowpane, you'll find the Arrow, Hand, and Zoom tools, and the Apply and Cancel buttons. The Arrow tool is used to select the preview pane that you'd like to work with. Once selecting a preview pane, you can set it to preview a different image adjustment by clicking the drop-down menu located in the upper left corner of each preview pane.

#3. Viewing an Adjustment's Intelligent Settings.

The Hand tool works the same as a typical Pan tool: by clicking and dragging in any preview pane, you can select which part of the photo you want to be displayed in the preview windows. Note that when deciding on which area of your photo to preview, it's often a good idea to choose an area that contains both foreground and background elements, since this will give you the best look at how the adjustment you select will affect your entire image.

The Zoom tool is used to zoom in to and out of your photo. Clicking the Zoom tool and then clicking on any preview pane increases the zoom. To decrease zoom, click in the window while holding down the Alt key (Windows) or the Option key (Mac).

The Apply button is used to apply the adjustments in the currently selected windowpane to your photo (the currently selected windowpane will always have a red border). To return to your photo editor without making any changes to your photo, click the Cancel button.

#4. Before.

Intellihance Pro makes three adjustment modes available: Intelligent Adjustment, Fine Tune, and Power Variations. Each mode uses a slightly different set of tools, but they all make use of Intellihance's ability to display an original image and multiple preview images. I'll look first at Intellihance Pro's default mode, Intelligent Adjustment mode. Intellihance Pro's modes are accessed via the Mode menu.

Intelligent Adjustment Mode
Intelligent Adjustment mode makes available a total of 22 different types of adjustments, each designed for a particular type of imaging problem. The available adjustments are: Bright Enhance, Clean Up, Dark Image Enhance, Darken, Deep Enhance, Descreen, Despeckle, Digital Camera, Digital Camera Flash, Drum Scanner, Dust Reduction, Edge Enhance, Flat-bed Scanner, Focus, Halftone Enhance, Heavy Cast Removal, Photo CD, Scratch Reduction, Smooth, Soft Enhance, Vector Enhance, Vivid Enhance. In addition, the Original Image, the Last Applied adjustment, and Quick Enhance are also available.

#5. After. A sample photo from a digital camera before and after using the Intellihance Digital Camera adjustment. .

You can view the types of changes that a particular adjustment applies by using the Arrow tool to select the windowpane that's using that adjustment, and viewing the "Intelligent Settings" on the upper right side of the interface (#3). If no windowpane is using the adjustment you'd like to preview, use the Arrow tool to select any windowpane, and then select the adjustment you want to preview using the windowpane's drop-down menu.

The sample image I'm using here is a photo my cousin took of his kids using a digital camera. So, I decided to try Intellihance's Digital Camera adjustment. My main concern with the original image was the excessive shadows covering the faces of the kids. The Digital Camera adjustment successfully brightened the shadows, without applying too much overall brightness to the images (#4 and #5). This is precisely what Intellihance Pro is designed to do: fix common image problems with single click efficiency.

#6. Setting Color Balance using Intellihance Pro's Power Variations mode.

ine Tune Mode
Fine Tune mode is used to make manual adjustments using seven filters: Descreen, Dust & Scratches, Brightness/Contrast, Saturation, Cast, Sharpness, and Despeckle. I don't want to devote too much time to this mode, since your photo editor contains similar filters that are capable of the same adjustments. However, there are some advantages to making these adjustments from within Intellihance Pro that are worth mentioning: You can start out in Intelligent Adjustment mode using an adjustment such as Digital Camera. Then, if you're not completely satisfied with the adjustment, you can switch to Fine Tune mode to make additional enhancements.

You can save your adjustments to "Presets" if you want them to be available for other images. The preset will then be available in Intellihance Pro's drop-down menus. To save a preset, click File, and then click Save Preset As. To delete a preset, click File, and then click Delete Preset.

Intellihance Pro enables working with multiple filters from within a single interface. For example, you can adjust Brightness/Contrast, then adjust Sharpness, and then Despeckle, all from within the same window.

Power Variations Mode
Power Variations mode enables you to choose a filter and view your original image plus up to 24 different previews of the same filter being applied at different strengths. The number of previews available depends on the layout that you're using. As with other Intellihance modes, the original image plus 24 previews is available in 5x5 layout. Since I feel that this many previews is somewhat excessive, I usually use Power Variations mode with the layout set to 3x3 mode.

Intellihance Pro's Power Variations mode is a true power tool for increasing productivity. For example, consider the steps involved in setting a brightness level using your photo editor's built-in tools. You have to try a setting, look at the preview image, try another setting, look at another preview image... Intellihance Pro significantly reduces the time this process takes by placing multiple preview images, each with a different setting, in a single interface.

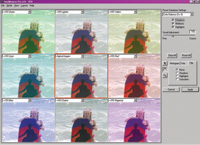
There are seven filters available in Power Variations mode: Contrast, Brightness, Saturation, Red/Cyan Cast, Green/Magenta Cast, Blue/Yellow Cast, and Sharpen. Power Variations also include a Color Balance filter that previews your image with eight different color and lightness adjustments: Red, Green, Blue, Cyan, Magenta, Yellow, Lighter and Darker (#6).

#7. A photo with washed out, poorly colored highlights.

The Color Balance can be applied to your entire photo, or just to the highlights, midtones, or shadows. This can be particularly useful when you want to make minor color adjustments that don't affect an entire image. The Highlight, Midtone, and Shadow checkboxes, located in the upper right corner of the Intellihance Pro interface, are used to control this process. To apply the Color Balance filter to the entire photo, no changes are needed. To turn off color correction for your photo's highlights, midtones, or shadows, remove the checkbox next to its name.

In #7, the shadows (such as the dark areas on the surfboard), and the midtones (such as the model's flesh tones), both look correct. However, the photo's highlights (such as the water and sky) have a washed out green tone instead of the blue tone they should have. This can easily be corrected by applying the Color Balance filter only to the photo's highlights.

Click on the Shadows and Midtones checkboxes (to remove the checkmarks), and then click on the Blue windowpane, to apply the blue color correction to the photo. The screen automatically updates to display the photo with the blue color correction in the middle windowpane, and the surrounding windowpanes update to show a preview of what the image will look like with additional color corrections. I clicked the Blue windowpane twice, to apply the blue color range two times, and then clicked the Apply button, which change the original image and closes Intellihance Pro.

#8. The image after adjustment using the Power Variation's Color Balance filter.

The results are seen in #8: A photo with a more vibrant, significantly bluer ocean and sky. Since the Blue filter was applied only to the photo's highlights, the flesh tones and dark areas of the image are virtually unchanged.

Installing On Non-Adobe Or Corel Photo Editors
To install for programs other than Photoshop or Corel Photo-Paint that accept Photoshop plug-ins, follow
these steps:
1. Choose Corel Photo-Paint as your photo editor. If you receive a message saying, "Can't find Corel Photo-Paint in the Registry," just click okay.
2. When prompted to confirm the loction of your Corel "plug-ins" folder, use the Browse button to find your photo editor's "plug-ins" folder.
3. When the installation is complete, search for the file "etoolbox.dll," copy it, and paste it into your system folder. For Windows 98 and Windows Me this is usually located at "C:\Windows\System," for Windows 2000 and NT "C:\WinNT\System32," and for Windows XP "C:\Windows\System32."

Intellihance Pro is available for Windows and Macintosh (including Mac OS X). A demo version can be downloaded from "http://www.extensis.com/intellihancepro" and their website is www.extensis.com/intellihancepro.

Tony Celeste appreciates feedback from his readers. You may contact him at aceleste@comcast.net

X