- REVIEWS
Camera Reviews 
More Reviews Mobile Reviews Photography Reviews - GALLERIES
- VIDEOS
- BUYER'S GUIDES
How to Nail the Most Important Color in a Photo: White (VIDEO)

Here's an important post-processing tutorial for all you avid wildlife and landscape photographers, that will help you get the white right with a little help from Lightroom. Once you do that, other colors tend to fall into place.
Instructor Simon d'Entremont is a Canadian pro, specializing in nature and wildlife photography, who posts weekly image-editing tutorials that explain his favorite techniques. Today he demonstrates how easy it is to use Lightroom's White Balance and Brightness tools to perfect the highlights in just about any image you shoot.
Simon says inaccurate white tones "are one of the main issues I see from inexperienced photographers, and many times they don't even know they have a problem." In fact, he insists that "white is the most important color in photography."
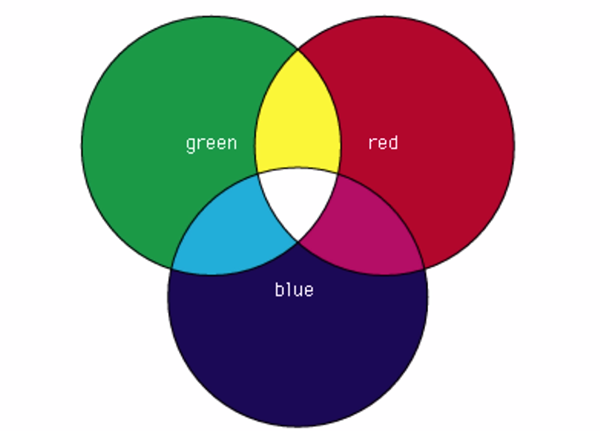
You're probably thinking to yourself that white isn't really a color. But according to Simon here's the deal: "Technically white is a color but it's an achromatic color—meaning it has no hue." So while white doesn't appear in the visible spectrum of light, it's what we perceive when we look at the combination all the wavelengths in the visible spectrum together.
With that out of the way, Simon explains that there are two main attribute of white to consider when making adjustments: Brightness levels and White Balance. Problem occurs when white tones in an image are either too dark, too bright, too orange, or too Blue. And that's what Simon explains how to fix in the 11-minute video below.
These important attributes are somewhat subjective because, to some degree, they depend upon the mood or feeling you want to convey. Simon begins with a discussion of adjusting White Balance—a characteristic that impacts all colors but "is most easily detected in hueless colors like white or gray." Here the goal is neutralizing odd color casts to make images appear more natural.

The other key attribute of white tones in a photo is its level or brightness. Simon notes the importance of paying close attention to the histogram where whites appear on the right side of the graph. You'll see that the closer they are to that side, the brighter they are, with pure white indicated on the far edge.
This theoretical discussion is merely a prelude to what follows; namely a step-by-step practical demonstration of the adjustments necessary for getting the whites right. After watching the video head over to Simon's instructional YouTube channel where you'll find a variety of tips and tricks for perfecting the photos you shoot outdoors.
On a related note, don't miss a recent tutorial we posted from another expert, with a one-minute Lightroom trick for achieving maximum dynamic range for every photo you capture outdoors.


![]()
Get the Latest Photo Tips, News & Reviews from Shutterbug!
| Camera Reviews Other Reviews | Mobile Reviews Photography Reviews Columns | News | Features | How-To | Resources |
 © 2025 Shutterbug
AVTech Media Americas Inc., USA
All rights reserved