- REVIEWS
Camera Reviews 
More Reviews Mobile Reviews Photography Reviews - GALLERIES
- VIDEOS
- BUYER'S GUIDES
How to Give Bland Outdoor Photos Epic Dusk Colors in Photoshop (VIDEO)

We've all captured what we thought was a great photo, only to pull it up on the computer and discover it's not nearly as compelling as expected—particularly when shooting outdoors when there are several challenges to overcome.
Sometimes the problem can be easy fixed with a bit of thoughtful cropping, but other times you confront converging vertical lines or bland colors because your exposure settings missed the mark. Today's Photoshop tutorial from the PHLOG Photography YouTube channel explains how to correct these issues and more with some straightforward adjustments in Photoshop.
Instructor Christian Mohrle is an accomplished German landscape photographer whose image-editing tutorials are very popular among Shutterbug readers. The video below demonstrates his approach for transforming ho-hum late-day images into those that are really special.
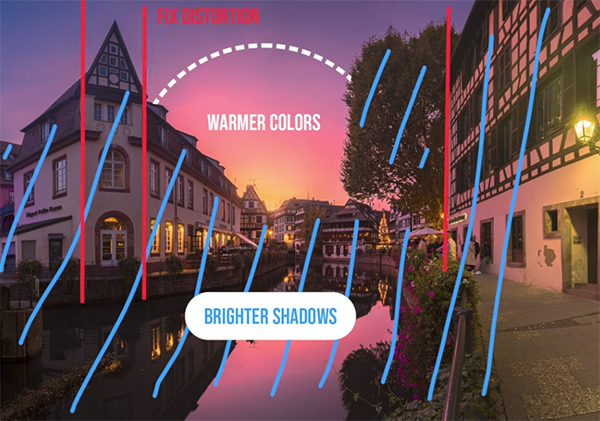
Mohrle begins with a bland panoramic photo that was shot after the sun dropped below the horizon, and, frankly, it needs a bunch of work. His primary goal is to pump up the colors while maintaining a realistic look, but there are other issues that require attention. As always, there's a link beneath the video for downloading the Raw file so you and Mohrle can make the fix together.
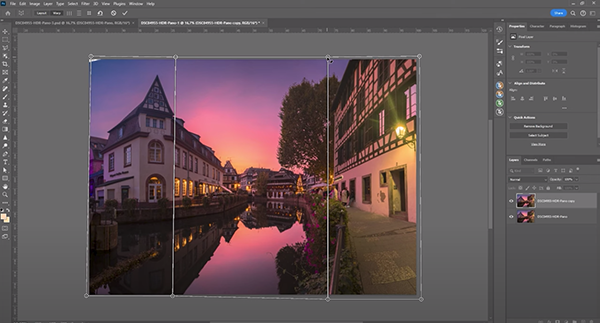
The lesson begins with some rather significant cropping to achieve more dynamic framing, and the wide format of the photograph provides plenty of flexibility. The next step is an initial correction of the shewed perspective of the buildings that gives the strange appearance as though they're leaning outwards. He quickly uses Photoshop's Geometry tab for a first pass at this task, which he refines later in the lesson.
Next are a few very basic adjustments to prepare the image as much as possible for the selective masking enhancements that follow. These including changing the profile from Adobe Color to Adobe Landscape, improving exposure in the Lights Panel, and a few other quick tweaks. Now it's time for straightforward masking to improve the image even further.
The real magic occurs as Mohrle demonstrates several color grading enhancements that provide a truly stunning look. He also employs careful sharpening before further refining the remaining distortion of the buildings.
All that's left to complete the transformation is a quick fix for lens flare and the addition of glow to the bright area of the sky. He provides all the important settings for each step of the process. The difference between his before/after images is truly remarkable.
You can find more editing tips and tricks for editing landscape images by paying a visit to Mohrle's' instructional YouTube channel, so be sure to take a look.
And on a related note, check out the tutorial we posted recently from another accomplished outdoor photographer who explains how to edit sunset photos in Lightroom, with free presets included.


![]()
Get the Latest Photo Tips, News & Reviews from Shutterbug!
| Camera Reviews Other Reviews | Mobile Reviews Photography Reviews Columns | News | Features | How-To | Resources |
 © 2025 Shutterbug
AVTech Media Americas Inc., USA
All rights reserved