- REVIEWS
Camera Reviews 
More Reviews Mobile Reviews Photography Reviews - GALLERIES
- VIDEOS
- BUYER'S GUIDES
Color Grade Outdoor Photos Like a Pro When Editing in Lightroom (VIDEO)
We often turn to the PHLOG Photography YouTube channel for their latest tutorials that explain how to process landscape images for unique and compelling effects. Today's episode from one of our favorite image-editing instructors demonstrates how to transform dull images by creating an awe-inspiring sunrise look in Lightroom Classic.
Cristian Mohrle is an acclaimed German photographer and educator whose processing workflow can be a real revelation. As always, he includes a link to his demonstration Raw File so that you can follow along while making the changes yourself.
Mohrle notes that "with contrast-rich scenes like this we first want to merge an HDR file so we can use the full potential of dynamic range." As you see, all this takes are a couple quick clicks. Next Mohrle makes a few basic adjustments to prepare the uninspiring shoreline photo for the magic that follows.
These preliminary modifications begin by changing the profile from Adobe Color to Adobe Landscape which immediately boosts base saturation. He then raises shadows and whites while dropping the blacks. Other global enhancements employ White Balance tools to restore warm sunrise tones as much as possible.
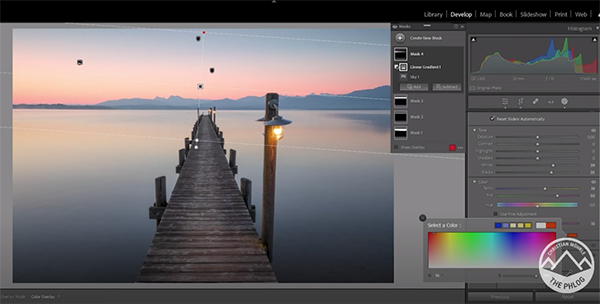
After a few more quick tweaks it's now time for the meat of the tutorial that starts in Lightroom's Masking panel. Mohrle employs Linear Gradients to adjust both the sky and the water in the foreground, as well as a Radial Gradient to add a small, subtle glow to the top left corner of the frame.
The image is now significantly improved and much closer to the sunrise appearance that Mohrle wants to achieve. He now boosts the effect further with judicious and straightforward color grading. He pulls up Lightroom's Color Mixer to work on the Hue by slightly dropping the orange and yellow tones. Mohrle then turns to the Saturation tab and bring up reds and yellows, while further dropping the orange tones. He slightly increases the blues, and then uses the split-toning effect we explained yesterday to top off his color enhancements.
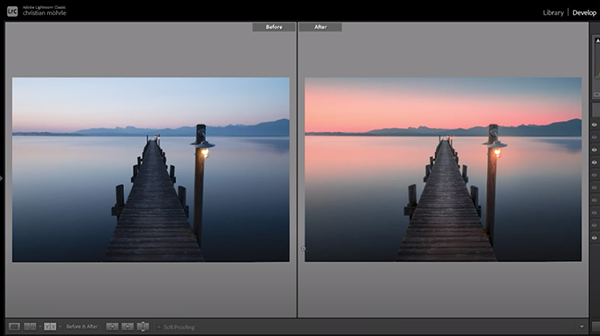
All that's left to complete the amazing transformation is a bit of very careful sharpening. Check out Mohrle's before/after image and you'll be convinced that this technique is a winner. Then head over to his instructional YouTube channel for more powerful landscape editing and shooting techniques.
And don't forget to watch the tutorial we mentioned above in which another accomplished pro demonstrates how to use split-toning when editing outdoor photographs in Lightroom.


![]()
Get the Latest Photo Tips, News & Reviews from Shutterbug!
| Camera Reviews Other Reviews | Mobile Reviews Photography Reviews Columns | News | Features | How-To | Resources |
 © 2025 Shutterbug
AVTech Media Americas Inc., USA
All rights reserved