Any suggestions on where to purchase this? Shipping charges for online vendors are prohibitive.
Black Acrylic Glass: Magical Reflections
The size of the piece you use depends on the space you have available and the subject matter being photographed. Plastic is a petroleum product, and the industry has had price increases every year for the past three years. Therefore, you don’t want to buy a very large piece if you intend to shoot small subjects like flowers. The piece I bought was half of a sheet—4x4 ft by 1/8” thick—and I paid $50 for it. You can see in figure A that this gives you a large enough area to use it for many subjects.
It’s very important to keep the surface clean. Even though imperfections can be handled in processing, you don’t want to spend unnecessary time cleaning up scratches and dirt. Black acrylic glass shows fingerprints, too, so handle it with care. Hold it by the edges or wear soft gloves.
Like any indoor setup, you can do a variety of things with the background. When I photographed the white violin (I bought a cheap violin at a pawn shop and painted it white for this shot) (#1), I used a black velvet background. I wanted all of the attention on the subject without any diversion to elements, or lighting, behind the musical instrument. For the portrait (#2), instead of taking the time to set up the velvet background, I placed the table on which the glass was supported far enough away from the wall in my basement studio so the light fall-off guaranteed a dark background. The f/16 lens aperture also made sure the background would be black.

All Photos © Jim Zuckerman

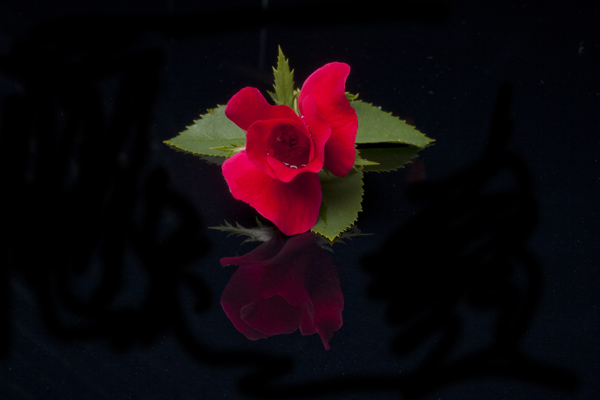
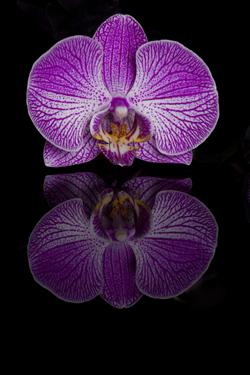
I used the black acrylic glass for the macro shot of a rose I picked in my garden (#3). Notice how subtle the reflection is. The black color is what gives this kind of reflection its elegance. In my opinion, no other colored reflective surface could come close to this. I did the same thing with an orchid in (#4) and notice that I was very careful in not allowing the flower’s weight to crush the lower petals. I had my son hold the flower from behind, and I put a small piece of black velvet on his hand so it wouldn’t show in the picture.

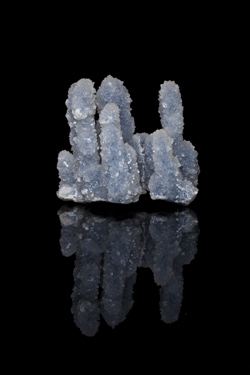
When I was in India, I bought a piece of black quartz specifically to photograph. I’ve tried to shoot it with several different kinds of environments and backgrounds, but I was never happy with the results until I used black acrylic glass (#5). Instantly the beauty and the mystery of the mineral came to life.
The background doesn’t always have to be dark or black, of course. You can be creative with it, but don’t make it so attention-grabbing that it takes attention away from the subject and its reflection. I placed a spotlight behind the unusual (my wife says “scary”) figure I found in Peru (#6), to add some drama to the image. When I am shooting subjects reflected in black acrylic glass, I hesitate to do much more than this to the background.

When I set up the T-rex skeleton to shoot (this is a model about 28” in length) (#7), I didn’t like the base on which the dinosaur’s feet were attached. Since the 1/8” acrylic is flexible, I simply lifted it up an inch and pulled it to cover the wooden platform. That solved the problem, and now the image doesn’t have anything that takes our eye away from the prehistoric skeleton.

Black acrylic glass is a wonderful prop to photograph glassware. In image (#8) I photographed a Venetian wine decanter and matching glasses and the dark reflection repeats the beauty and artistry of the subjects. With this kind of contrast—the acrylic glass juxtaposed with the reflective glass surfaces—you have to be careful that your exposure doesn’t cause a loss of detail in any of the specular highlights.

- Log in or register to post comments


With all due respect, you're not even scratching the surface of this technique. The beauty of this is that you can create any tone, or gradation you want (even to pure white) by reflecting a panel in back of the setup and shining a light onto said panel. That's a whole thing to dive into though...
Most importantly, I would not recommend plexi or acrylic for this type of work at all. Its too soft and will scratch if you even look at it wrong... Always use real glass if this is the type of photography you do. You'll spend way less in the long run, and in the short run (while you're in the process of figuring out what I've already stated), you'll save yourself a ton of retouching time, taking out every little scratch from handling, and each product you place on the surface.
Get yourself a piece of 1/4" glass from the glass store. I use 36"x36" for travel/location shoots, and a full 48"x48" piece for my studio. Paint one side of the glass with flat black paint, preferably one with built in primer. Then paint the painted side with primer, then apply adhesive (liquid nails) to the primer. Then cut a 3/8ths sheet of plywood to the size of the glass and affix to the liquid nails. Weigh down the plywood with bricks while it drys. Tape off 3 sides of it with black gaffer tape for handling. The untaped side will be the side always placed away from camera (and will serve as a seamless horizon when you light the background correctly). That's the proper way to make a sheet of black glass that will last for years. I too tried acrylic and I was lucky if it lasted a couple shoots. You still have to be careful with handling and storage, but its a way more durable surface than plastic.
My source? Lighting Studio class at Brooks Institute in the 90's (before they were bought and sold and died a slow death and the hands of corporate greed)


