Architecture At Night And Twilight: Using The Best Light For The Best Results

All Photos © Jim Zuckerman

Architecture looks good in many types of lighting, such as front lighting, side lighting, back lighting, and when the sky is overcast and clouds are threatening. However, there is something especially mysterious, beautiful, and even magical when you take pictures of it at night or twilight. Even though night photography is wonderful and I often shoot after dark, my favorite time to photograph buildings, bridges, and cityscapes is just before dark when the sky turns cobalt blue. The mixture of the artificial lights with the deep blue color is stunning. This occurs whether you are shooting skyscrapers, archeological ruins, ultra modern architectural designs, or private homes.
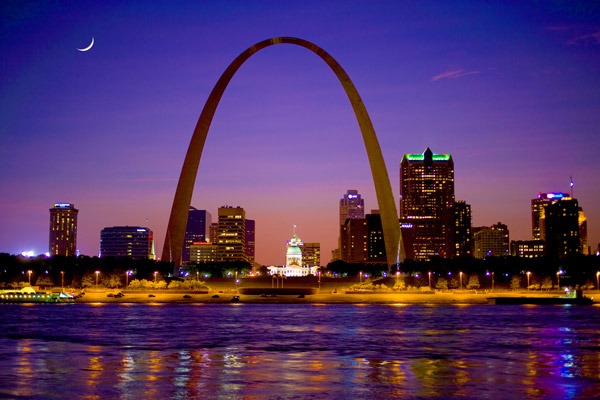
To illustrate what I’m referring to, look at photos (#3, #4, and #5). These are different types of subjects—a small town in Mexico, the ruins of Abu Simbel in Egypt, and an aerial view of the Chain Bridge in Budapest, Hungary—but they have in common the same kind of color scheme. The dark cobalt sky was juxtaposed with the golden colors of the architecture to produce visually compelling images. Sometimes, if you include the portion of the sky where the sun went down, you can add to the mix a red/magenta glow like you can see in the photo of the dramatic Arch that frames downtown St. Louis (#6).


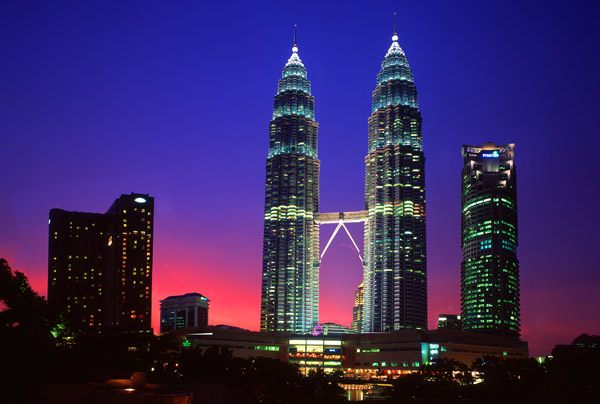
There is a difference between shooting at dusk and twilight. Dusk is after sunset but the sky hasn’t become dark enough for the maximum contrast and drama of twilight. The photograph of the twin towers in Kuala Lumpur, (#7), is an example of dusk. It is still an attractive type of lighting, but it’s not the peak experience that twilight offers (#8).

By contrast, night photography is beautiful, but not as colorful as twilight. The pagoda of Schwedegon in Rangoon, Burma is an example (#9). By contrasting two shots of the Brandenburg Gate in Berlin (#10 and #11) you can immediately see the difference between night and twilight photography. The stark black backdrop of a night sky is dramatic, but the cobalt blue sky seen at twilight is more exciting, in my opinion.


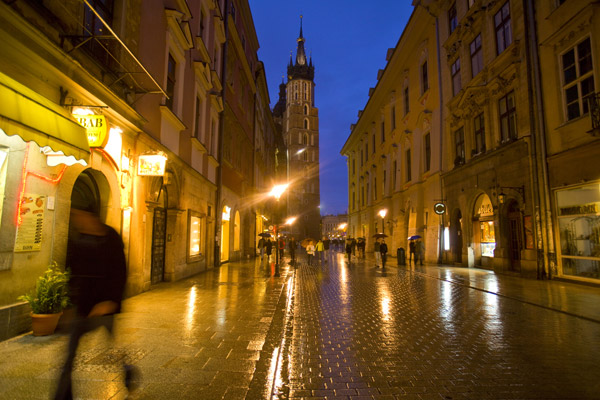
What is interesting about twilight photography is that the saturated dark blue color of the sky is not a function of a clear sky. You will get the same intense color if the sky is overcast or even if it’s raining. The picture I took in Krakow, Poland (#12) is an example. You can see by the glistening cobblestone that it was raining and yet the sky has the same cobalt color seen in other photos when the sky was clear. The color is entirely dependent on the time of evening you take the pictures. There has to be barely enough light in the sky to get the beautiful colors, and this does not count city lights reflecting off low clouds.
White Balance
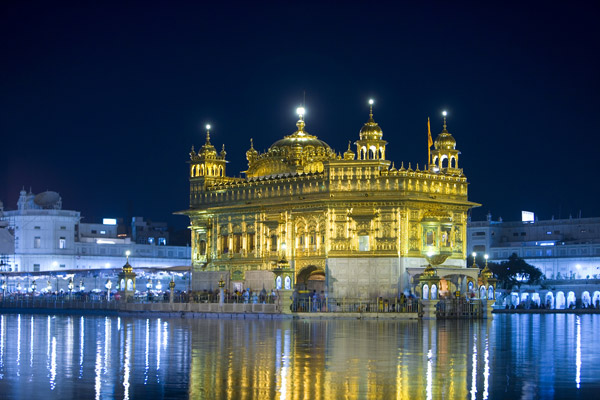
I shoot twilight and night photography on a daylight white balance setting most of the time. This produces the golden lighting that I like in contrast with the cobalt blue. Sometimes I will experiment with a tungsten white balance, and that creates a rich blue cast to the images. The picture of the Golden Temple in Amritsar, the capital of Punjab state in India, is an example (#13). I elected to use tungsten WB here because the temple is so golden that I thought the contrast with the deep blue environment would look compelling. In addition, as the entire image became blue, the temple would still remain gold.
Another example of using tungsten white balance is the artistically arranged group of lampposts from the 1920’s in Los Angeles (#14). If you shoot in Raw mode, as you should be doing, the white balance can be easily tweaked in Adobe Camera Raw or Lightroom using the temperature slider. However, if you want to see the immediate effect of experimenting with white balance at the time of shooting, then you can simply change it on the camera.

I only use auto white balance when I shoot florescent lights. AWB does a great job in rendering these types of lights with a correct color balance. If you photographed twilight or night scenes in the past with film, you’ll notice that the florescent and mercury vapor lights had a pronounced blue-green color bias. You can readily see this in the picture of Salobrena, Spain (#15). This was taken with daylight balanced film, and the castle became predictably yellowish due to the tungsten lights on the ancient Moorish architecture, but the town below was lit with mercury vapor street lamps and thus all of the buildings went from white to blue-green. With digital technology, this doesn’t happen when you use AWB.

Exposure
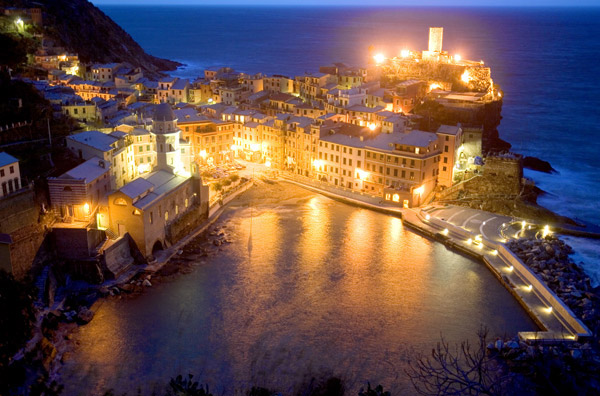
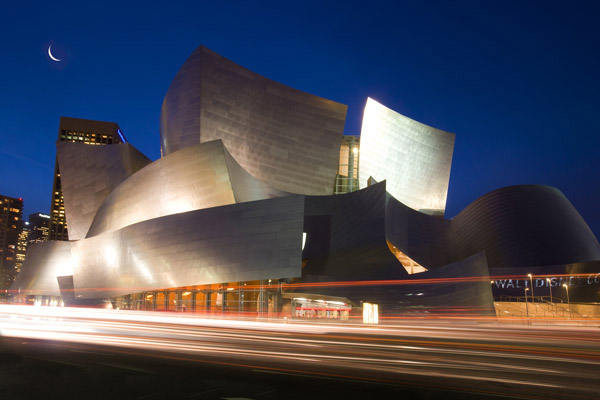
In a large majority of your twilight and night photos, the in-camera meter isn’t trustworthy to give you accurate exposures. The reason this happens is because meters are programmed to understand middle tone (Ansel Adams called it Zone V)—not extremes like brilliant highlights and dark shadows in the same composition. When you shoot at night, you have both—the brilliant lights of the city juxtaposed with the very dark tones like the sky, dark bodies of water, black shadows, etc. At best, the meter can average those values and try to come up with some kind of compromise that may or may not be correct. If you want to shoot a brick wall at night that is fairly evenly illuminated, then sure, the meter will do well. But if you have a picture like the picturesque village of Vernazza on the Cinque Terra coast of Italy (#16), you can see that the blindingly bright spotlights are so many f/stops lighter than the dark ocean that the meter wouldn’t know what the proper exposure value should be. The same can be said of the Disney Theater in Los Angeles (#17). The shiny metal of the structure is both reflecting light and in deep shadow, and the bright headlights of the traffic make the exposure even more challenging for a meter.
If you can’t rely on the meter, how then do you arrive at a proper exposure when shooting at night? There are three ways to do it:
1. You can locate an area of middle gray, or Zone V, in the picture and take a spot reading on that. Then you set the camera on Manual Exposure mode and use the shutter speed and f/stop reading from the meter. In the photo of Bodrun, Turkey (#18) I’ve circled the two areas of the image that you could use from which an accurate light reading could be taken. The key to using this method is the ability to identify a middle toned portion of the image (if one exists), and then you have to have a way to read just that small area while eliminating the rest of the scene from that reading. A hand-held 1˚ spot meter, like the Sekonic L-758, is what you need to do this or, if you can place the spot and lock exposure, an in-camera use of Spot Metering mode might do.

2. You can use a formula for a good twilight or night exposure that is based on experience. This is what I did when I shot film. The correct exposure for the photo of Bodrun, for example, is f/8 at 8 seconds when using ISO 100. If you use this exposure for most twilight and night photos, you will be pleased with the results because they will look just like this one. Of course, if you want more depth of field or a longer shutter speed (to blur movement, for example), you can simply extrapolate the numbers. For example, f/16 at 32 seconds using the same ISO will produce the exact same exposure. If you are using ISO 200, instead of f/8 at 8 seconds, you would be using f/8 at 4 seconds.
3. You can take a shot, look at the results on the LCD monitor on the back of your camera, and if the image is too light or too dark, you can tweak the exposure using the exposure compensation feature on the camera. I do this often now and it works perfectly.
- Log in or register to post comments


