Apple’s Aperture 2.1; A Better Workflow?
In a perfect world, photos would magically transport themselves from your camera to a safe location, fully metatagged and color corrected. Alas, the professional's workflow is not that simple. In a digital age, a streamlined workflow hinges on two factors: photo viewing speed and editing agility.
 |
|
|
Apple's Aperture 2.1 addresses both factors with a revved-up database
engine that makes it easier to find that one photo of the woman in the red scarf
you took last Monday. In addition, new Adjustment features encourage more experimentation
and produce better results. To find out exactly how these new enhancements change
the workflow, I put Aperture 2.1 through a series of tests (see "Aperture
2.1 Vs. Adobe's Lightroom 1.4" sidebar below). I also uncovered
new features, including powerful plug-in support and a few new interface tweaks.
Before I get to the enhancements, it's important to review Aperture's
strengths, and weaknesses. For the professional, Aperture is an all-in-one program.
It's the digital equivalent of a light table where you can review your
recent shoots and examine color attributes and metadata. It's like having
camera and darkroom in one as you can adjust color, exposure, add sepia tones,
lower the black point of a photo, and make other "adjustments" to
contrast, definition, saturation, and vibrancy. As a professional photographic
tool, Aperture assumes your photos do not need extensive retouching and editing--which
is to say: this is not Adobe's Photoshop. It's an important distinction.
Photoshop is essentially a graphic program--it's for postproduction,
not selection.
 |
|
 |
|
|
Here's an example: Say a client wants to show a banana
stalk in a grocery store ad. The photographer would use Aperture primarily to
select the ideal photo, so the speed of browsing is critical. The longer it
takes to flip through 100 shots of bananas, the longer the workflow. She may
choose to correct the color, perhaps sharpen an image or two, but the ultimate
goal is delivering the photo to the client. Photoshop, conversely, is primarily
an editing tool, which means photo browsing, color correction, and delivery
are secondary to retouching a photo: e.g., removing blemishes on one bad banana.
Once you understand these differences, it's easier to see why Aperture
works the way it does. Editing, though certainly available, is secondary to
browsing and delivery to clients. You can quickly e-mail full-res raw images
to a client, upload them to a .Mac Web Gallery, or just save them to a disc.
There's also a full-screen view that removes all the clutter and helps
you focus on examining photos, using a digital loupe if you wish.
Before And After Images |
|
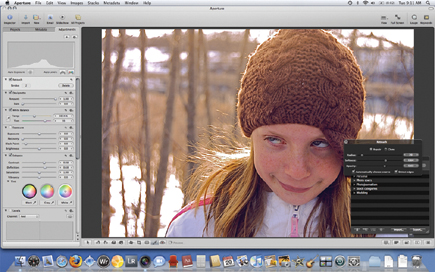
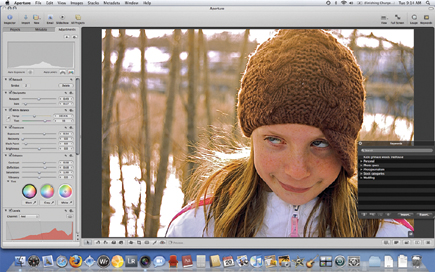
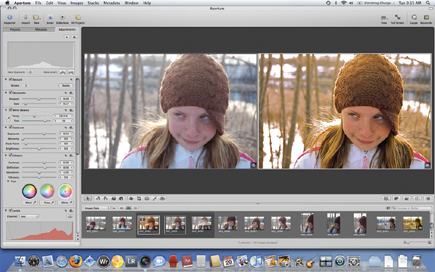
| Color correcting images is the core of what makes Aperture such a critical tool. Here, I added a brownish pale to my daughter's face and the background to make the colors more uniform. | |
 |
|
|
|
 |
|
|
|
Steps To Correct Image |
|
 |
|
|
|
 |
|
|
|
 |
|
|
New plug-in support--while so freshly minted that there are only a handful
of add-ons available--means third-party developers can now enhance the
product. I used one called DFT Light, which can add lighting behind a portrait
shot, increase lens flare, or just make the image look softer. There are also
a few minor tweaks to mention: a new All Projects view shows photo albums--you
can flip through photos in an album thumbnail just by moving the mouse back
and forth. As far as I can tell, metagging works the same in Aperture 2.1 as
previous releases, which is to say: it works quite well.
- Log in or register to post comments


