- REVIEWS
Camera Reviews 
More Reviews Mobile Reviews Photography Reviews - GALLERIES
- VIDEOS
- BUYER'S GUIDES
Problem Restorations Solved; Dealing With Lines And Paper Surface Page 2
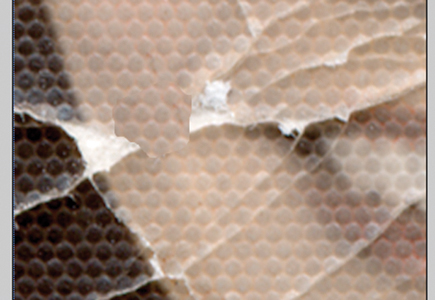
Next, I simply dragged the pasted-in section (it comes in on its own layer) into position where I needed a little repair (#4 and #9). It is a very slow process to cut out little pieces of good areas and then copy and paste them into bad areas. But, it is about the only method that works well with the specific type of problem--straight lines or textured paper surface.
 |
|
|
Sometimes, after pasting in a little piece, and before flattening the layer, I'll use the Erasure tool with a very soft-edged brush and nibble a bit around the edges of the pasted-in section to help blend it in better.
 |
|
|
|
 |
|
|
|
 |
|
|
Of course, you should be sure to do all of this type of work at a very large
magnification so you'll be able to see exactly what you are doing and
be able to pay close attention to the tiny little details.
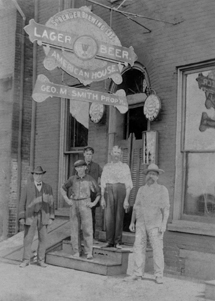
See the final restored images (#10 and #11).
 |
 |
||
|
|
For more information on digital imaging, you might want to visit my website at: www.colorbat.com.
|
| |||||||||
- Log in or register to post comments


![]()
Get the Latest Photo Tips, News & Reviews from Shutterbug!
| Camera Reviews Other Reviews | Mobile Reviews Photography Reviews Columns | News | Features | How-To | Resources |
 © 2024 Shutterbug
AVTech Media Americas Inc., USA
All rights reserved