- REVIEWS
Camera Reviews 
More Reviews Mobile Reviews Photography Reviews - GALLERIES
- VIDEOS
- BUYER'S GUIDES
Photoshop’s “HIDDEN” Halo-Removal Slider is MAGIC for Nature, Portraits, Sports & More (VIDEO)
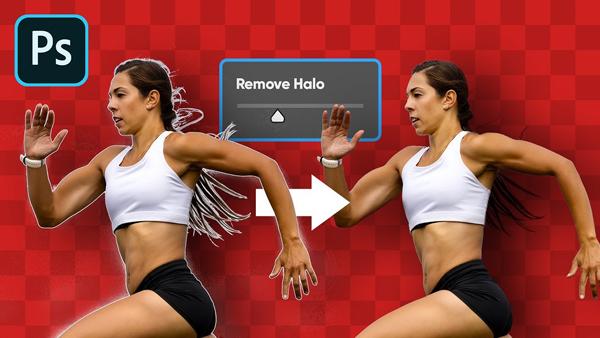
There are several reasons why unsightly white fringing appears in photographs. Sometime the cause is a high-contrast scene, like dark trees against a bright sky. These ugly halos may also result from heavy-handed editing, such as too much Sharpening or Clarity.
Halos can also appear after cutting out an object from one image and placing it on a different background, as you’ll see in the video below. Fortunately, Photoshop includes what one pro calls a “Hidden Halo Removal Slider” that works like magic regardless if the problem results from shooting or editing issues.

Unmesh Dinda is one of our go-to sources of quick and easy image-editing tutorials, and this episode takes barely four minutes. Once you get the hang of this helpful trick, you’ll be able to banish halos in less time than it takes to watch the video.
Dinda begins by cutting a runner out of a photo with a boring background, so he can place her against more vibrant background. This is just a simple bonus technique that you can use in a number of ways. As you’ll see, the halo problem occurs as soon as Dinda adds his subject to a bright, contrasty background.

To fix the problem Dinda first turns to the Lasso Tool, making sure to increase the Feather to avoid hard edges. Then he employs the Minimum Filter to push dark areas toward the bright areas. The next step is using the Maximum Filter to do the opposite; namely push bright areas toward dark areas.
Dinda recommends the best settings to use for accomplishing the above, as well as keyboard shortcuts to make the quick fix even faster. There are more powerful tips on Dinda’s YouTube channel, and be sure to look.
You may also want to check out another helpful tutorial we posted, explaining the best way to convert b&w images to color using artificial intelligence.
- Log in or register to post comments


![]()
Get the Latest Photo Tips, News & Reviews from Shutterbug!
| Camera Reviews Other Reviews | Mobile Reviews Photography Reviews Columns | News | Features | How-To | Resources |
 © 2024 Shutterbug
AVTech Media Americas Inc., USA
All rights reserved