- REVIEWS
Camera Reviews 
More Reviews Mobile Reviews Photography Reviews - GALLERIES
- VIDEOS
- BUYER'S GUIDES
The Digital Darkroom
Making Drop Shadows
|
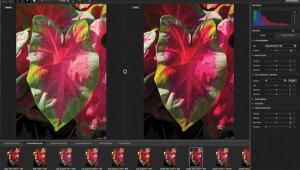
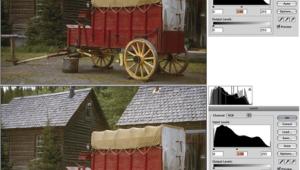
When taking a picture of an object, the exact background is no longer as important as it once was because we can now change it so easily in Photoshop. For example, #1 is a picture I recently took of a vase that I was preparing to offer for sale on an Internet auction service. But after I took the picture, I decided that the background did not exactly show the vase off very well. Make Your Selection Once the outside edge was painted in, I could switch to a much larger brush (200 pixels) and quickly paint in the rest of the vase. The vase with the Quick Mask completed is shown in #4. Next, turn the Quick Mask mode off and the image will show up with the normal "dancing ants" all around the selected object. Since we painted in the object that we wanted to select, we now have to reverse the selection in order to perform the actual selection on the object. So, go to Select to Inverse. Next, go to Edit to Copy in order to copy the selected vase to the imaginary storage space in the computer known as the Clipboard. New Canvas Now it's time to create a nice background. Highlight the Background layer in the Layers Pallete in order to make it active. Then, be sure that the colors black and white are set up as the foreground and background colors. Finally, get the Gradient Tool and choose the circular option. Place the cursor in the dead center of the image and with the left mouse key, drag to any outside corner and release. That will lay in a circular, gradient, white-to-black background. Then, in order to lighten it up a bit, I went to Image to Adjustments to Brightness/ Contrast and lightened the entire background layer a little. See #6 for the results. At this point, I had a nice vase, and a nice background. But, the vase seemed to be floating in midair making it look a little unnatural. It needed a drop shadow! And, here is what this column is all about-putting in a drop shadow for a three-dimensional object. Start by going to the Layers Pallete and dragging the layer with the vase into the Create A New Layer icon at the bottom of the Layers Pallete. I call the little icon the Duplicating Machine! Next, highlight the second layer. See #7. Now, go to Image to Adjustments to Hue/Saturation. Drag the Lightness slider bar all the way to the left. See #8. That will turn the vase in Layer #1 to a solid black color. Now, go to Edit to Transform to Distort. See #9. Grab the little handle that the red arrow points to in #10 and drag the handle downward. Play with it. You'll get the idea. In my case, I continued to drag the little handle down until the image looked like #11. At this point, hit the Enter key on the keyboard to render the effect. Then get the Move Tool and drag the shadow around a little to better position it, as in #12. Now we have the shadow, but it is way too crisp and a little too dark to look real. So, in order to soften it up a bit, go to Filter to Blur to Gaussian Blur. The Gaussian Blur Tool allows you to select the degree of blur that you want. This is a judgment factor. Just drag the little slider bar and watch the shadow in the image. When #13 looks right, stop!. Now in order to lighten the shadow a bit, go to Image to Adjustments to Brightness/Contrast, and again, lighten the shadow until it looks right. See #14. Now, the vase no longer appears to be floating in midair. By the way, if you are having trouble getting your printer to produce what you see on the monitor screen, you need to do a little color calibration on your system. I have a CD-ROM that walks you through the calibration process. It's easy to do with Photoshop 5.5 or higher and any Epson ink jet printer. I normally sell the CD for $19.95, but I'll make it available to Shutterbug readers for just $3 to cover my costs. Send an e-mail to me care of Shutterbug (editorial@shutterbug.net) and I'll tell you where to send the money. |
|
|
|
|


- Log in or register to post comments


![]()
Get the Latest Photo Tips, News & Reviews from Shutterbug!
| Camera Reviews Other Reviews | Mobile Reviews Photography Reviews Columns | News | Features | How-To | Resources |
 © 2024 Shutterbug
AVTech Media Americas Inc., USA
All rights reserved