- REVIEWS
Camera Reviews 
More Reviews Mobile Reviews Photography Reviews - GALLERIES
- VIDEOS
- BUYER'S GUIDES
Creating Panoramic Images Digitally
Get A Super Wide View With Normal Lenses
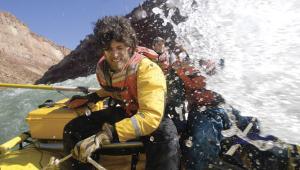
This past summer, my wife
and I took a road trip across the country and along the way we spent
a few days in Yellowstone National Park and in the Badlands of South
Dakota. Both places are visually stunning and as you might guess, both
are very popular spots for photographers. However, anyone armed with
a camera is immediately faced with the considerable challenge of how
to effectively capture all that they're seeing. |
|||
The other great thing about
the E-20N is that it accommodates relatively inexpensive conversion lenses.
You can affix macro, telephoto, and wide angle conversion lenses quickly
and simply. I used a wide angle conversion lens here for my panoramic
series of a scene in the Badlands. |
|||
Since the sun was still hitting the lens, I affixed a remote release cable to the camera to trigger the shutter, stood to the side of the camera so that I could see the lens, and carefully positioned a Photoflex 12" Black/Silver LiteDisc (with the black side facing the camera) to block the sun from hitting the lens. I then squeezed the cable release button to trigger the shutter (#1 and #2). Having previously set the tripod
to keep the base of the camera level, I spun the camera on the base of
the tripod head 15Þ to the right, locked it down and took another
shot (#3). |
|||
After the trip, I downloaded
these images to my computer and opened them up in Adobe Photoshop to create
a single panoramic image (#5). |
|||
During our trip, there were many scenes that I photographed using this same technique. Along a stretch of road in Idaho, I didn't use the wide angle conversion lens because I wanted to keep the horizon line perfectly straight. Instead, I took four shots at the standard zoom setting and later stitched them together to achieve this seamless result (#6). |
|||
One of my favorite compositions
is of a series of shots taken at dusk in Yellowstone National Park. My
wife and I had just set up tent one evening when I noticed some dramatic
clouds looming overhead. I grabbed the camera and tripod and ran down
to a nearby river and set up for this surreal scene (#7). |
|||
This lesson will be posted in the free public section of the Web Photo School at: www.webphotoschool.com. You will be able to enlarge the photos from thumbnails. If you would like to continue your digital step by step education lessons on editing, printing, and e-mailing your photos it will be on the private section of the Web Photo School. To enroll for WPS just go to www.shutterbug.net and click on WPS Free Lessons. Technical Information |


- Log in or register to post comments


![]()
Get the Latest Photo Tips, News & Reviews from Shutterbug!
| Camera Reviews Other Reviews | Mobile Reviews Photography Reviews Columns | News | Features | How-To | Resources |
 © 2024 Shutterbug
AVTech Media Americas Inc., USA
All rights reserved